
Help Centre › Clinical care
Consultations
Examine the patient, record what you found, charge what you used, and finish the visit into an invoice.
A consultation is one visit by one patient. It holds the clinical record — notes, vitals, diagnosis, lab results — and the invoice, which is built from the items you add as you work.
Starting a consultation#
- Open the consult queue from Home.
- Find the patient and press Consult.
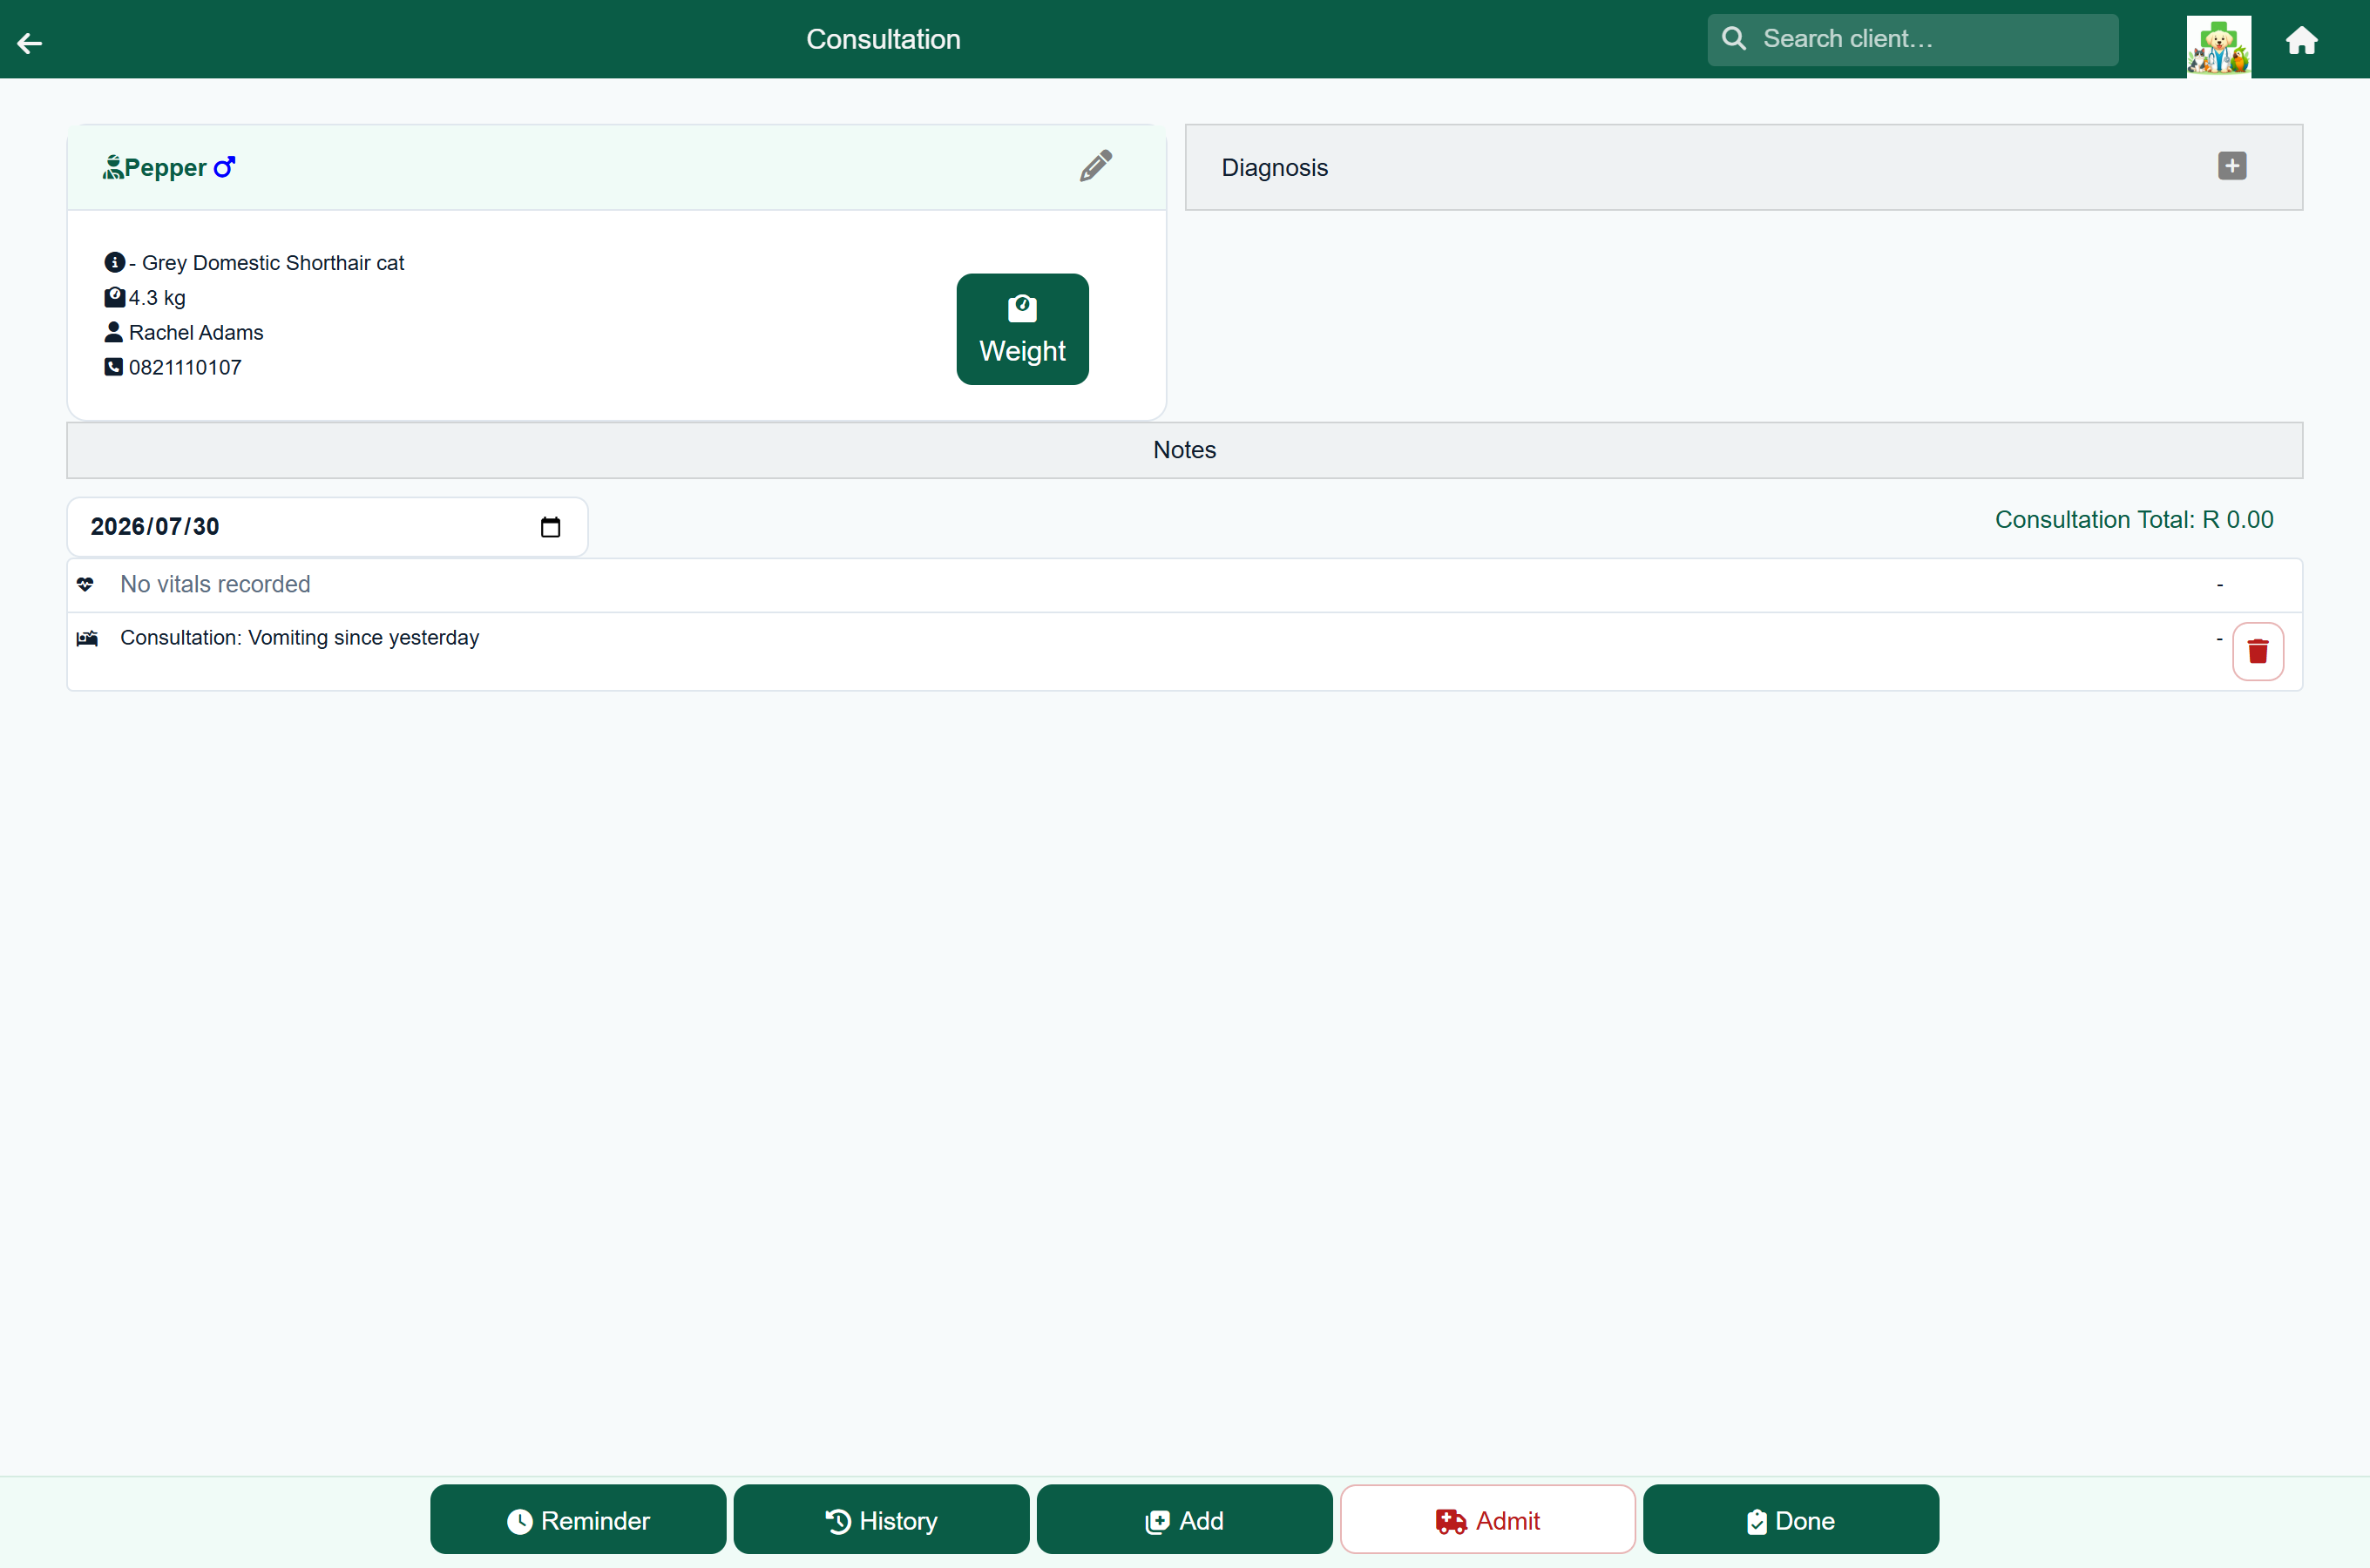
| Area | What it holds |
|---|---|
| Order number | Business accounts only: the client's order number, and who brought the animal in. See Business accounts. |
| Patient panel | The patient's name, sex and weight, with the date of birth, breed, owner, phone number, any balance owing, and notes on the patient and the client. The Weight button records the weight for this visit, and the pencil edits the patient. Tap the heading to fold the panel. |
| Diagnosis | The patient's standing problem list, in your own words. See Diagnosis. |
| On medication | What the patient is already on. Only appears when there is something. See Prescriptions & repeats. |
| Previous visit summary | A short AI-written recap of recent history. Only appears once the patient has one, and starts folded. See Voice notes & AI summaries. |
| Notes | Doctor's Notes (internal) and Client Notes (shown to the client). See Clinical notes. |
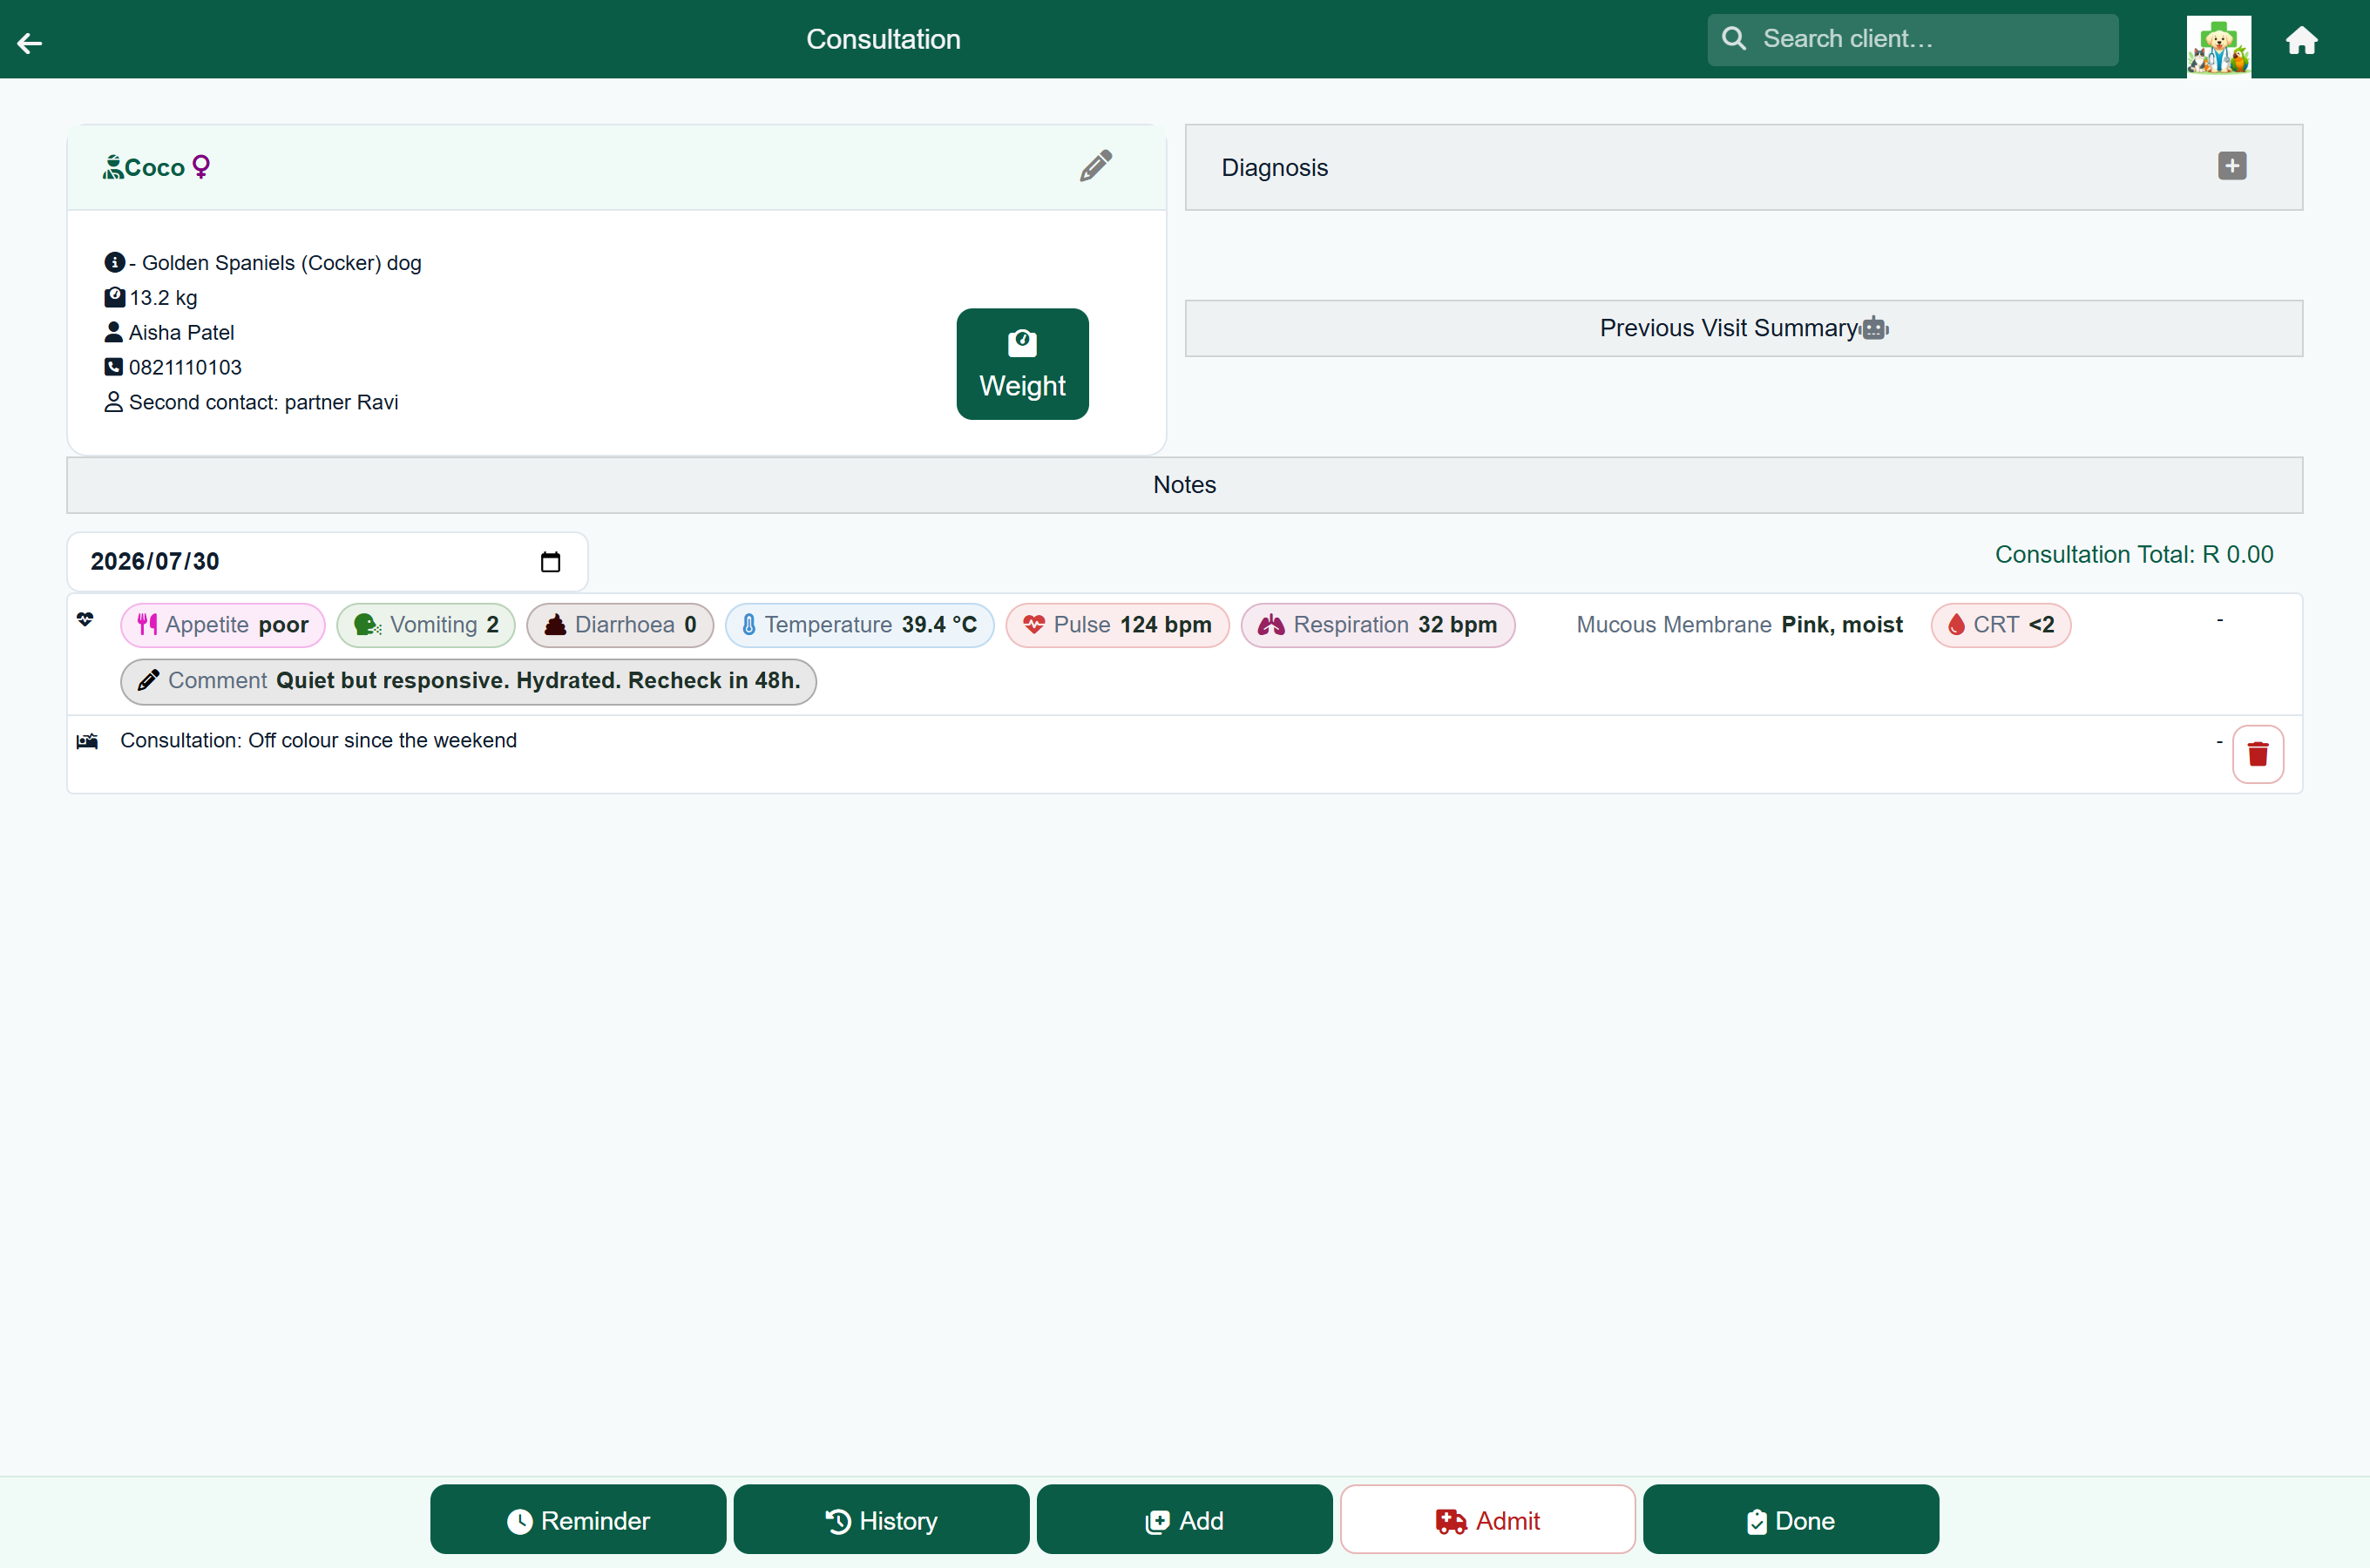
| Invoice | The date, the treating vet, the vitals readings, and every item charged, with the running total. |
| Discharge sheets | Aftercare sheets attached to this visit. Only appears once there is one. |
| Reminders | Reminders set from this visit. Only appears once there is one. |
Who the consultation belongs to#
Beside the date on the invoice is the treating vet — the person whose work this visit is. It is filled in when the consultation opens, and you can change it at any time, including after the visit is finished.

- If the patient was queued for a named doctor, that doctor is the treating vet — even if somebody else opened the record.
- Otherwise it is whoever pressed Consult.
The treating vet is separate from whoever presses Done, so reception can finish a visit without taking the credit for it.
Charging items#
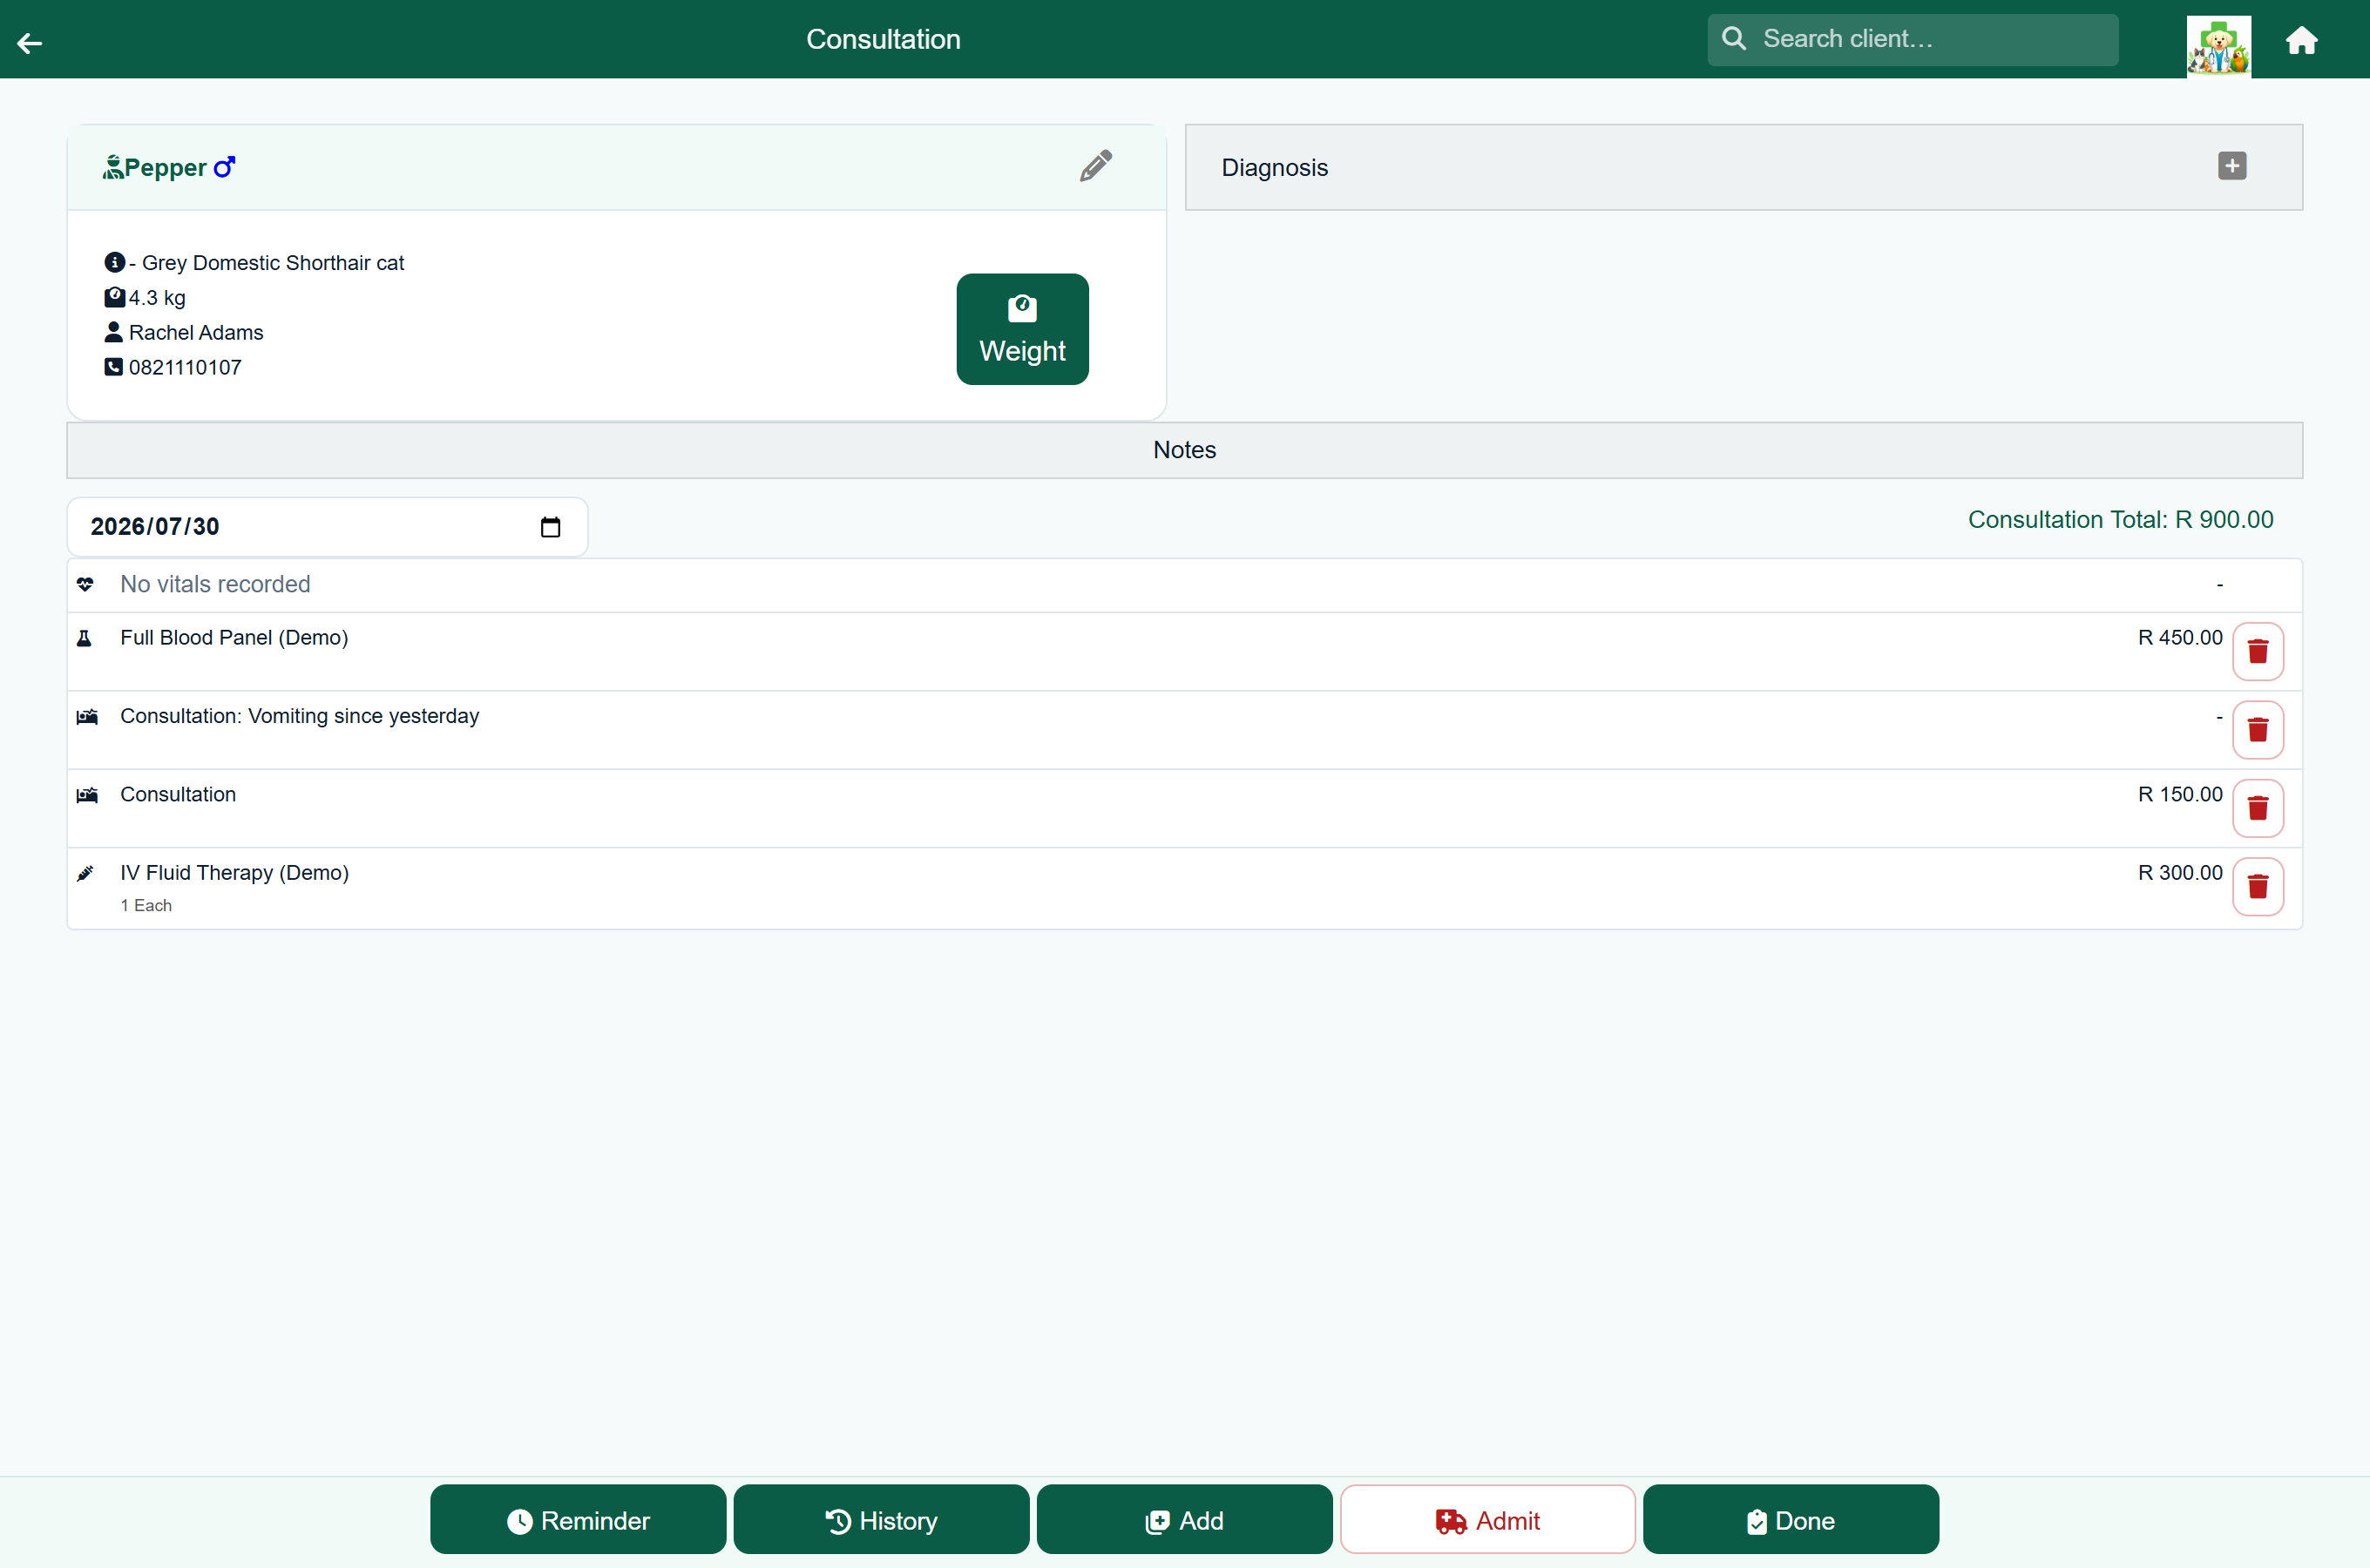
Everything you use — the consultation fee, drugs, vaccines, lab work, procedures — is added the same way, through the price picker.
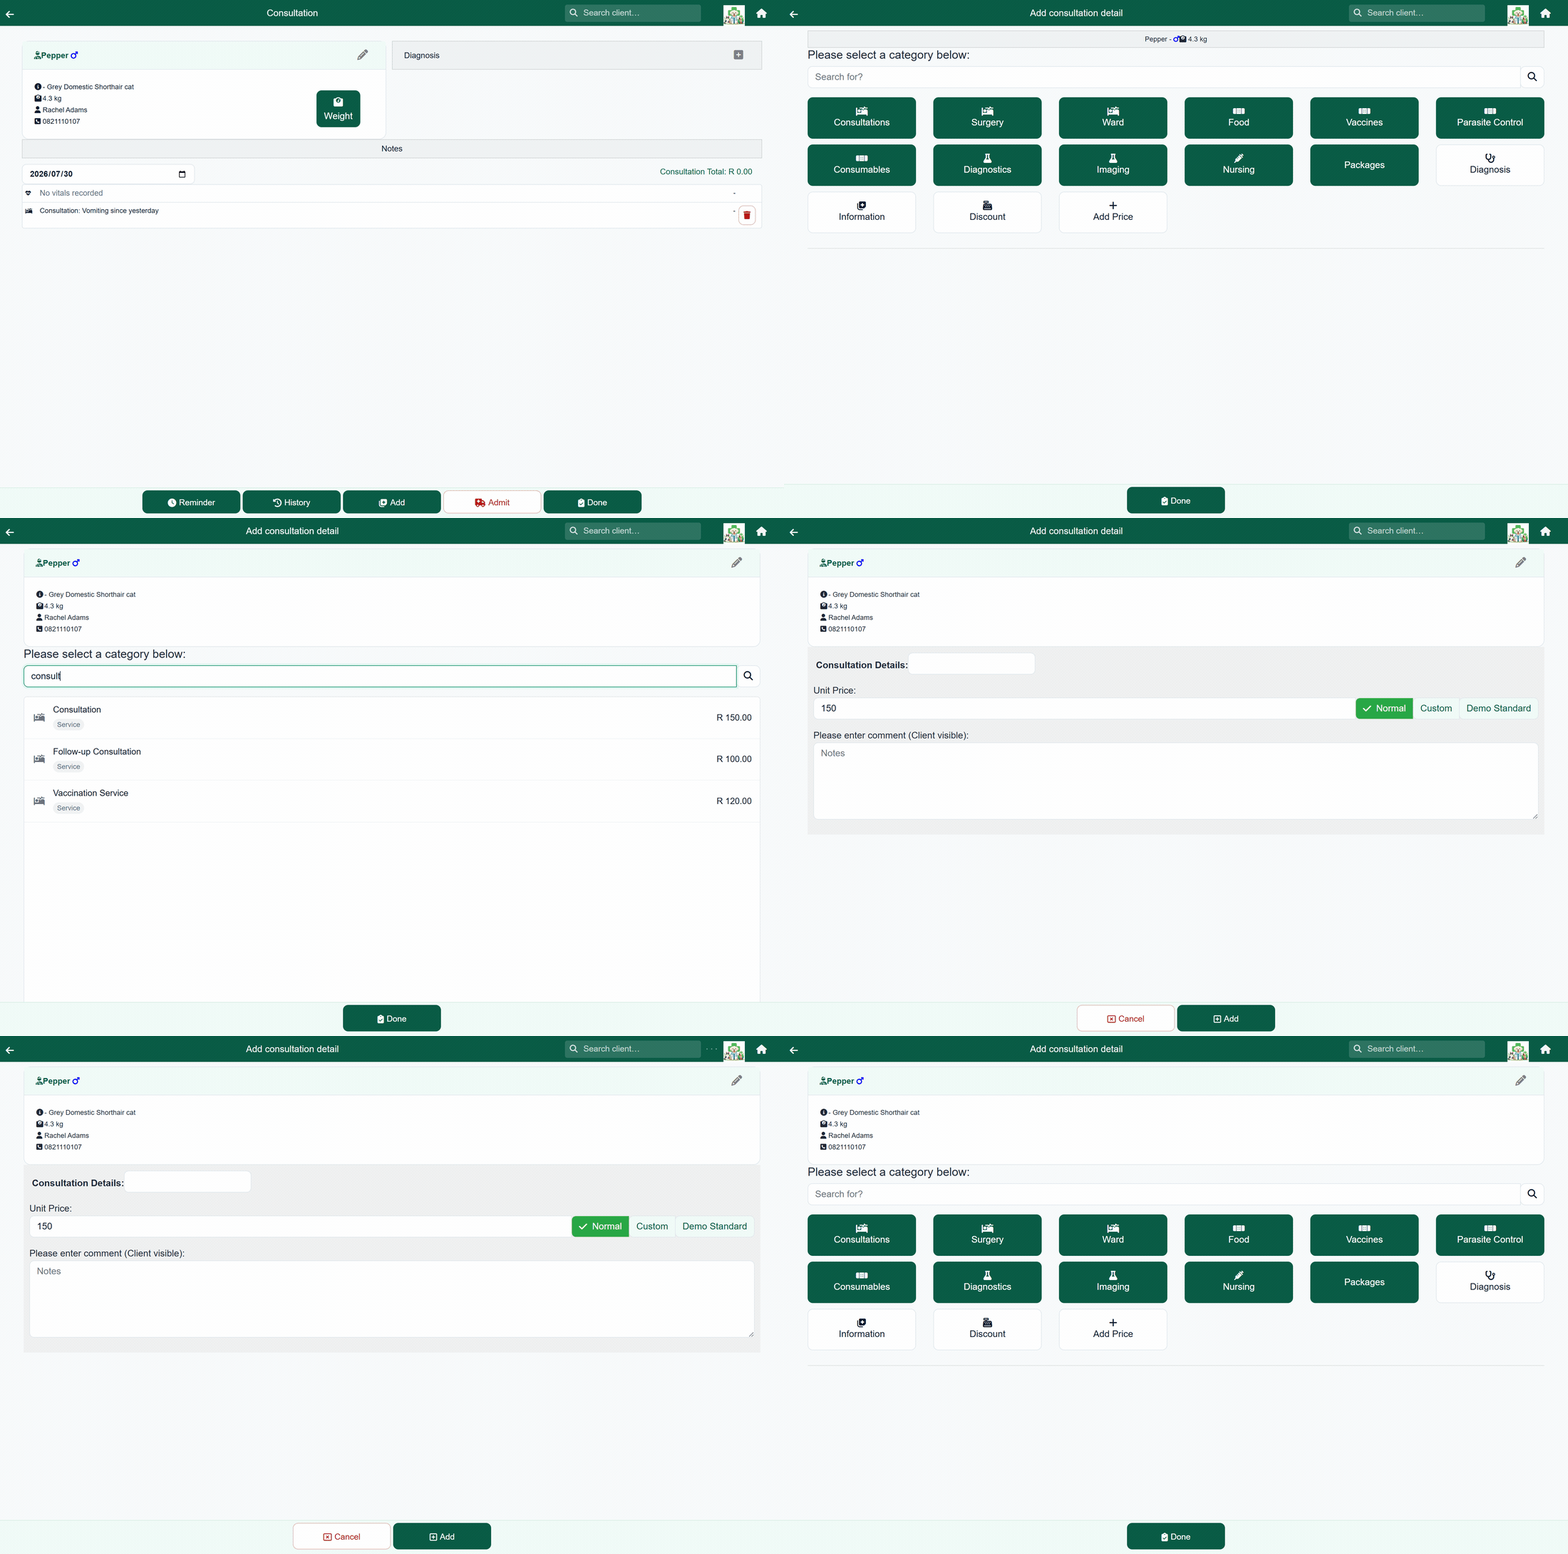
- Press Add in the footer.
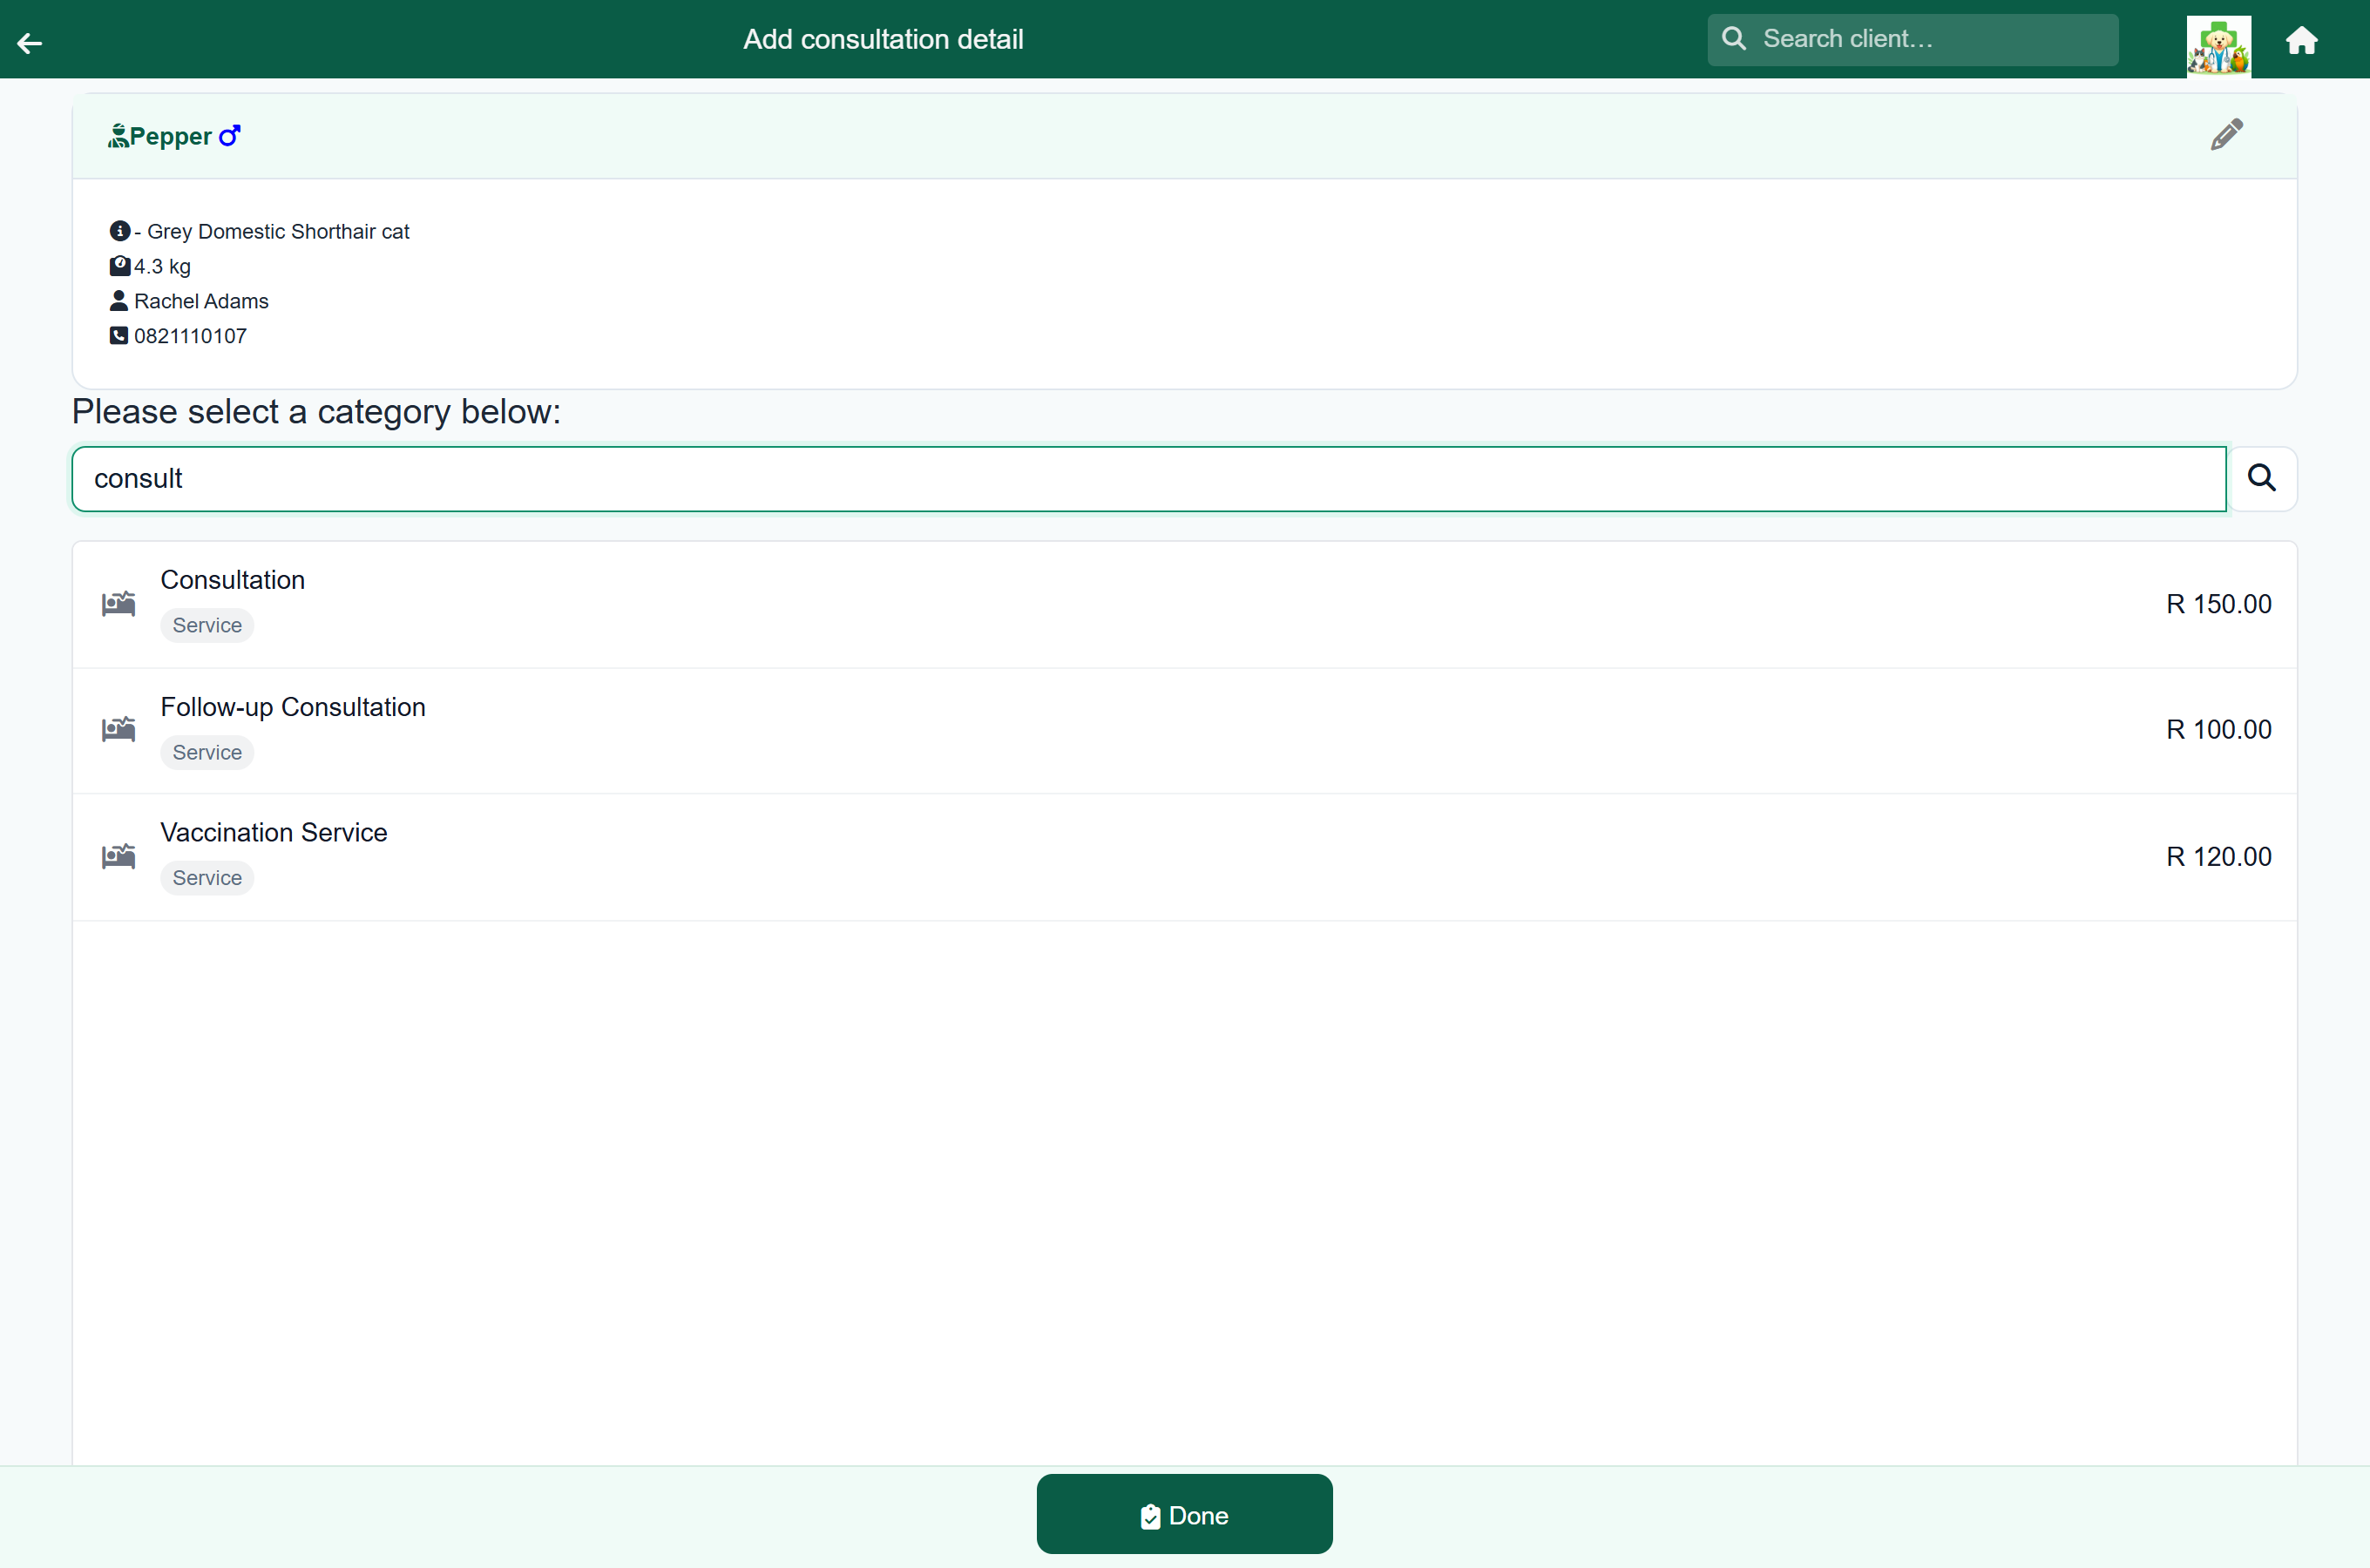
- Search for the item by name, or browse by category.
- Tap the item you want.
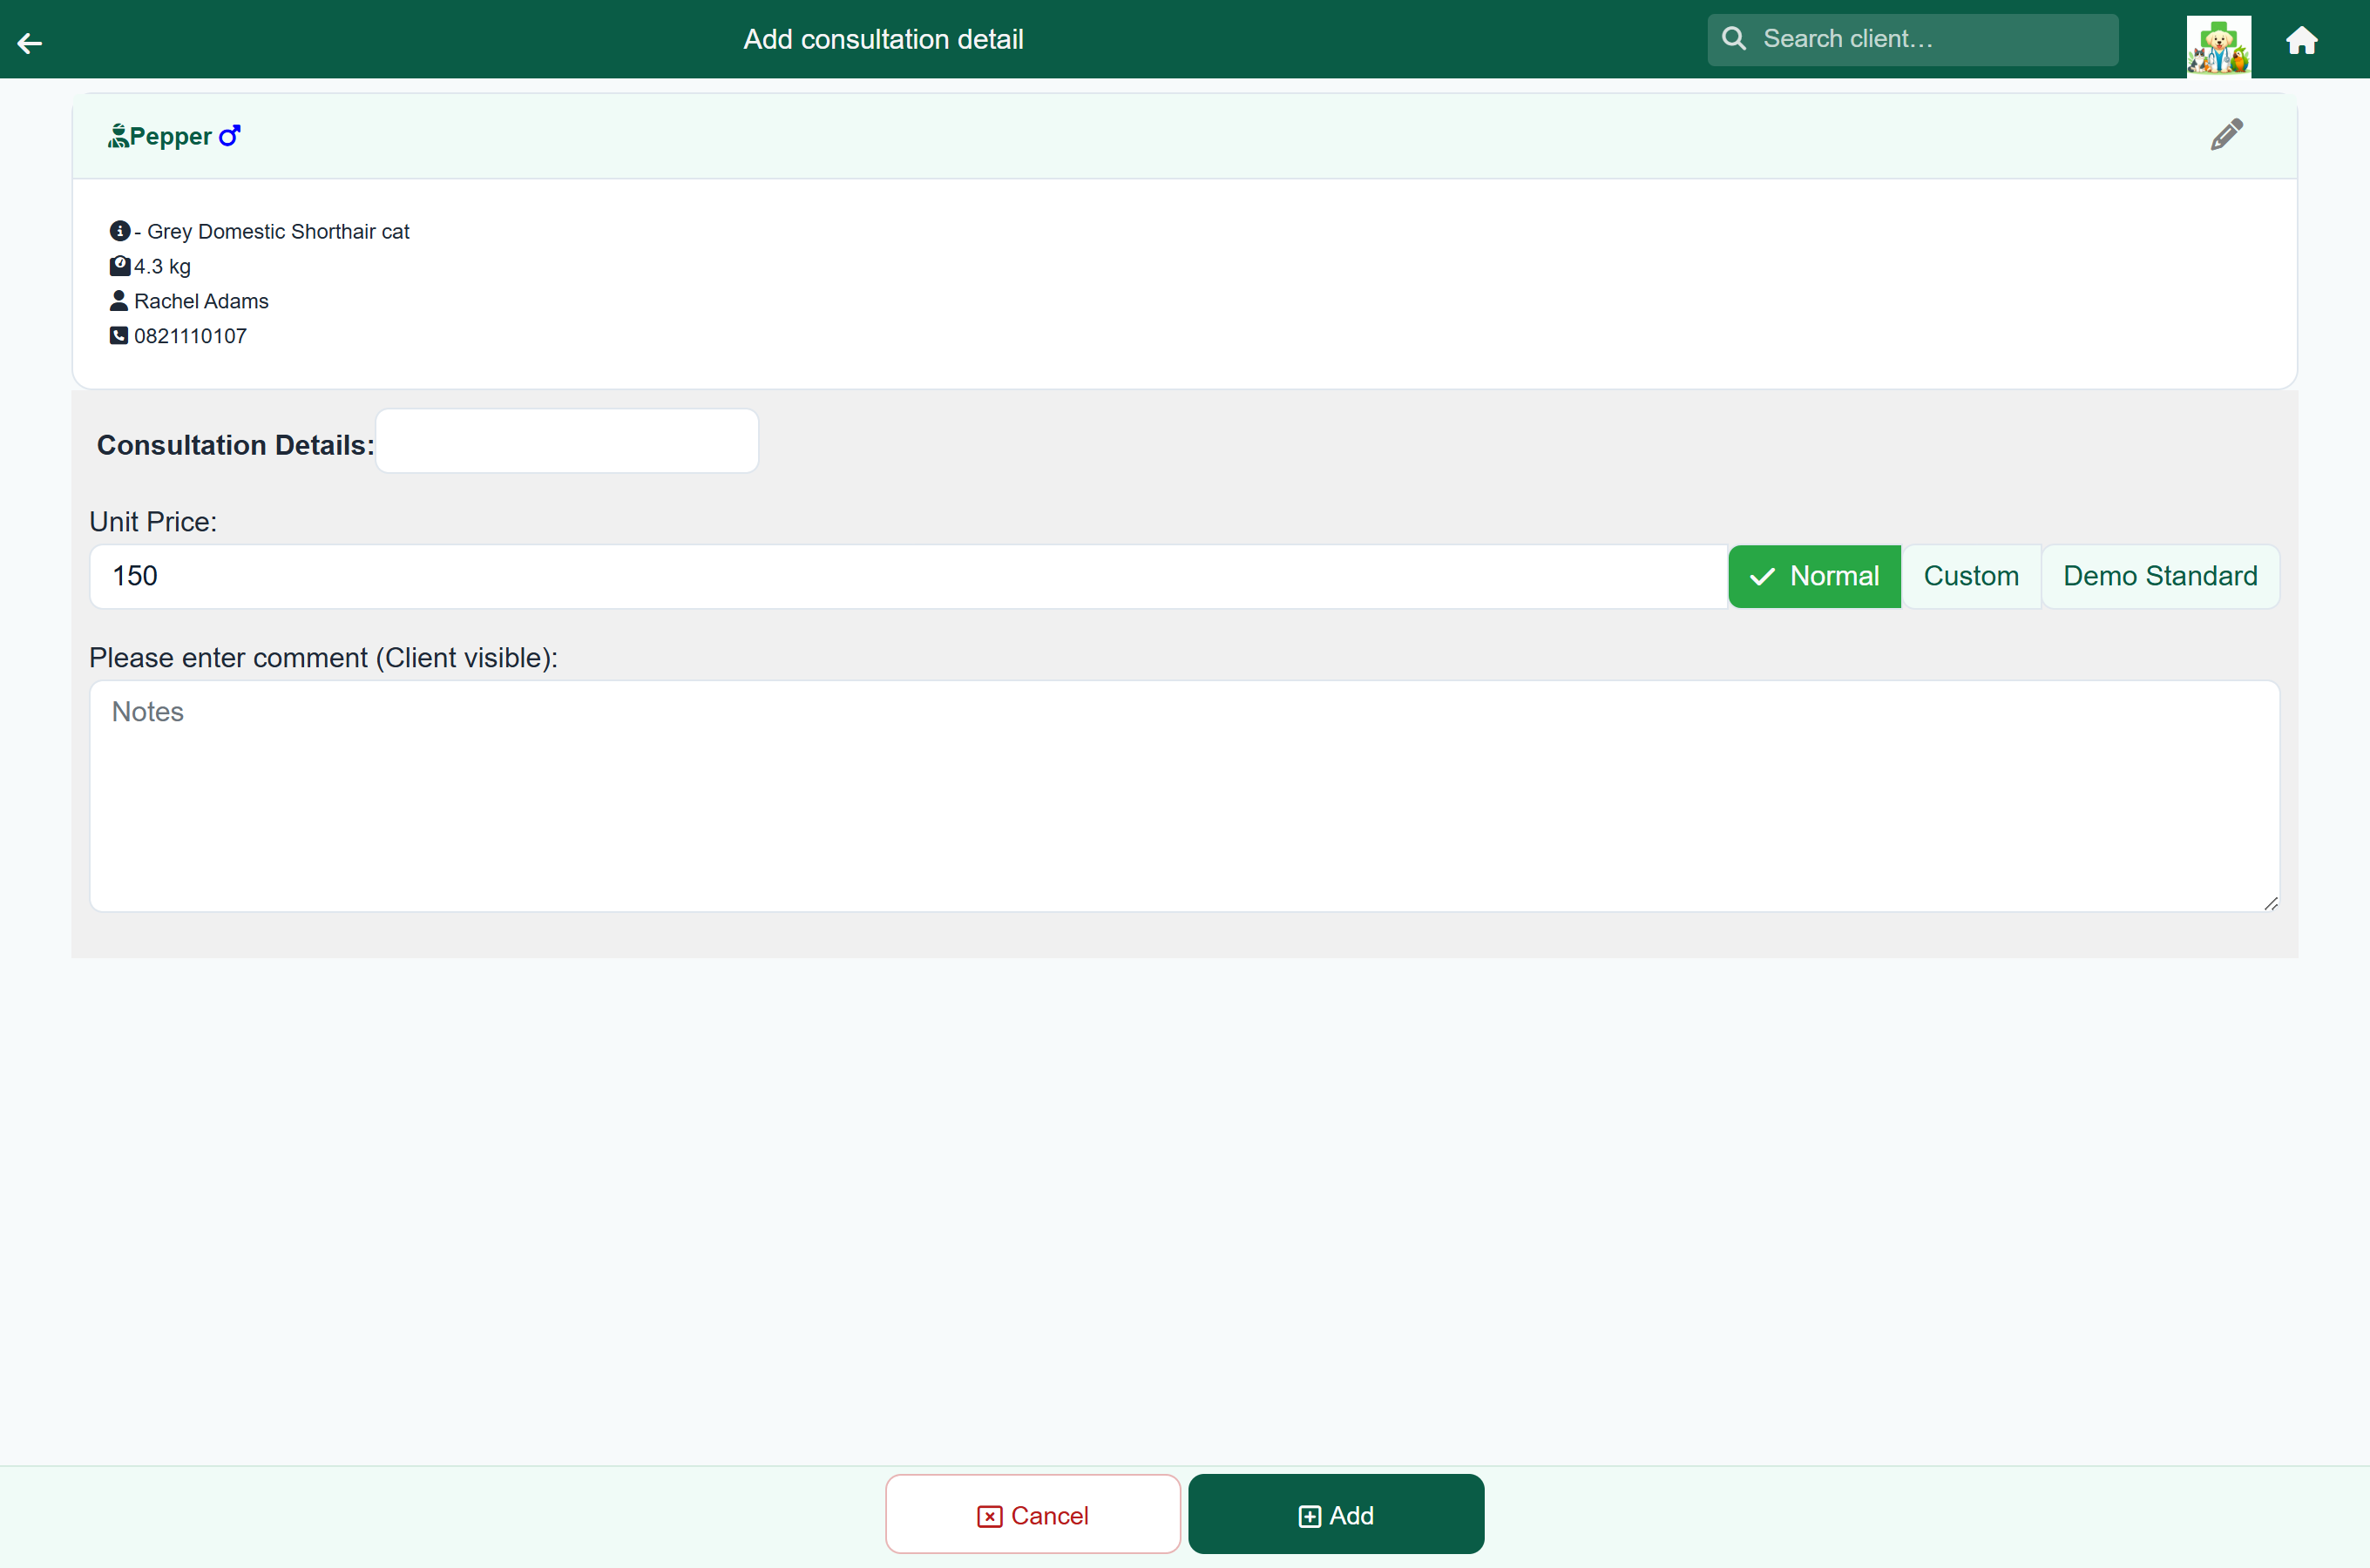
- Check the unit price, and the quantity for anything sold by quantity. Add a client-visible comment if useful, and press Add.
Dispensing: instructions and a printed label#
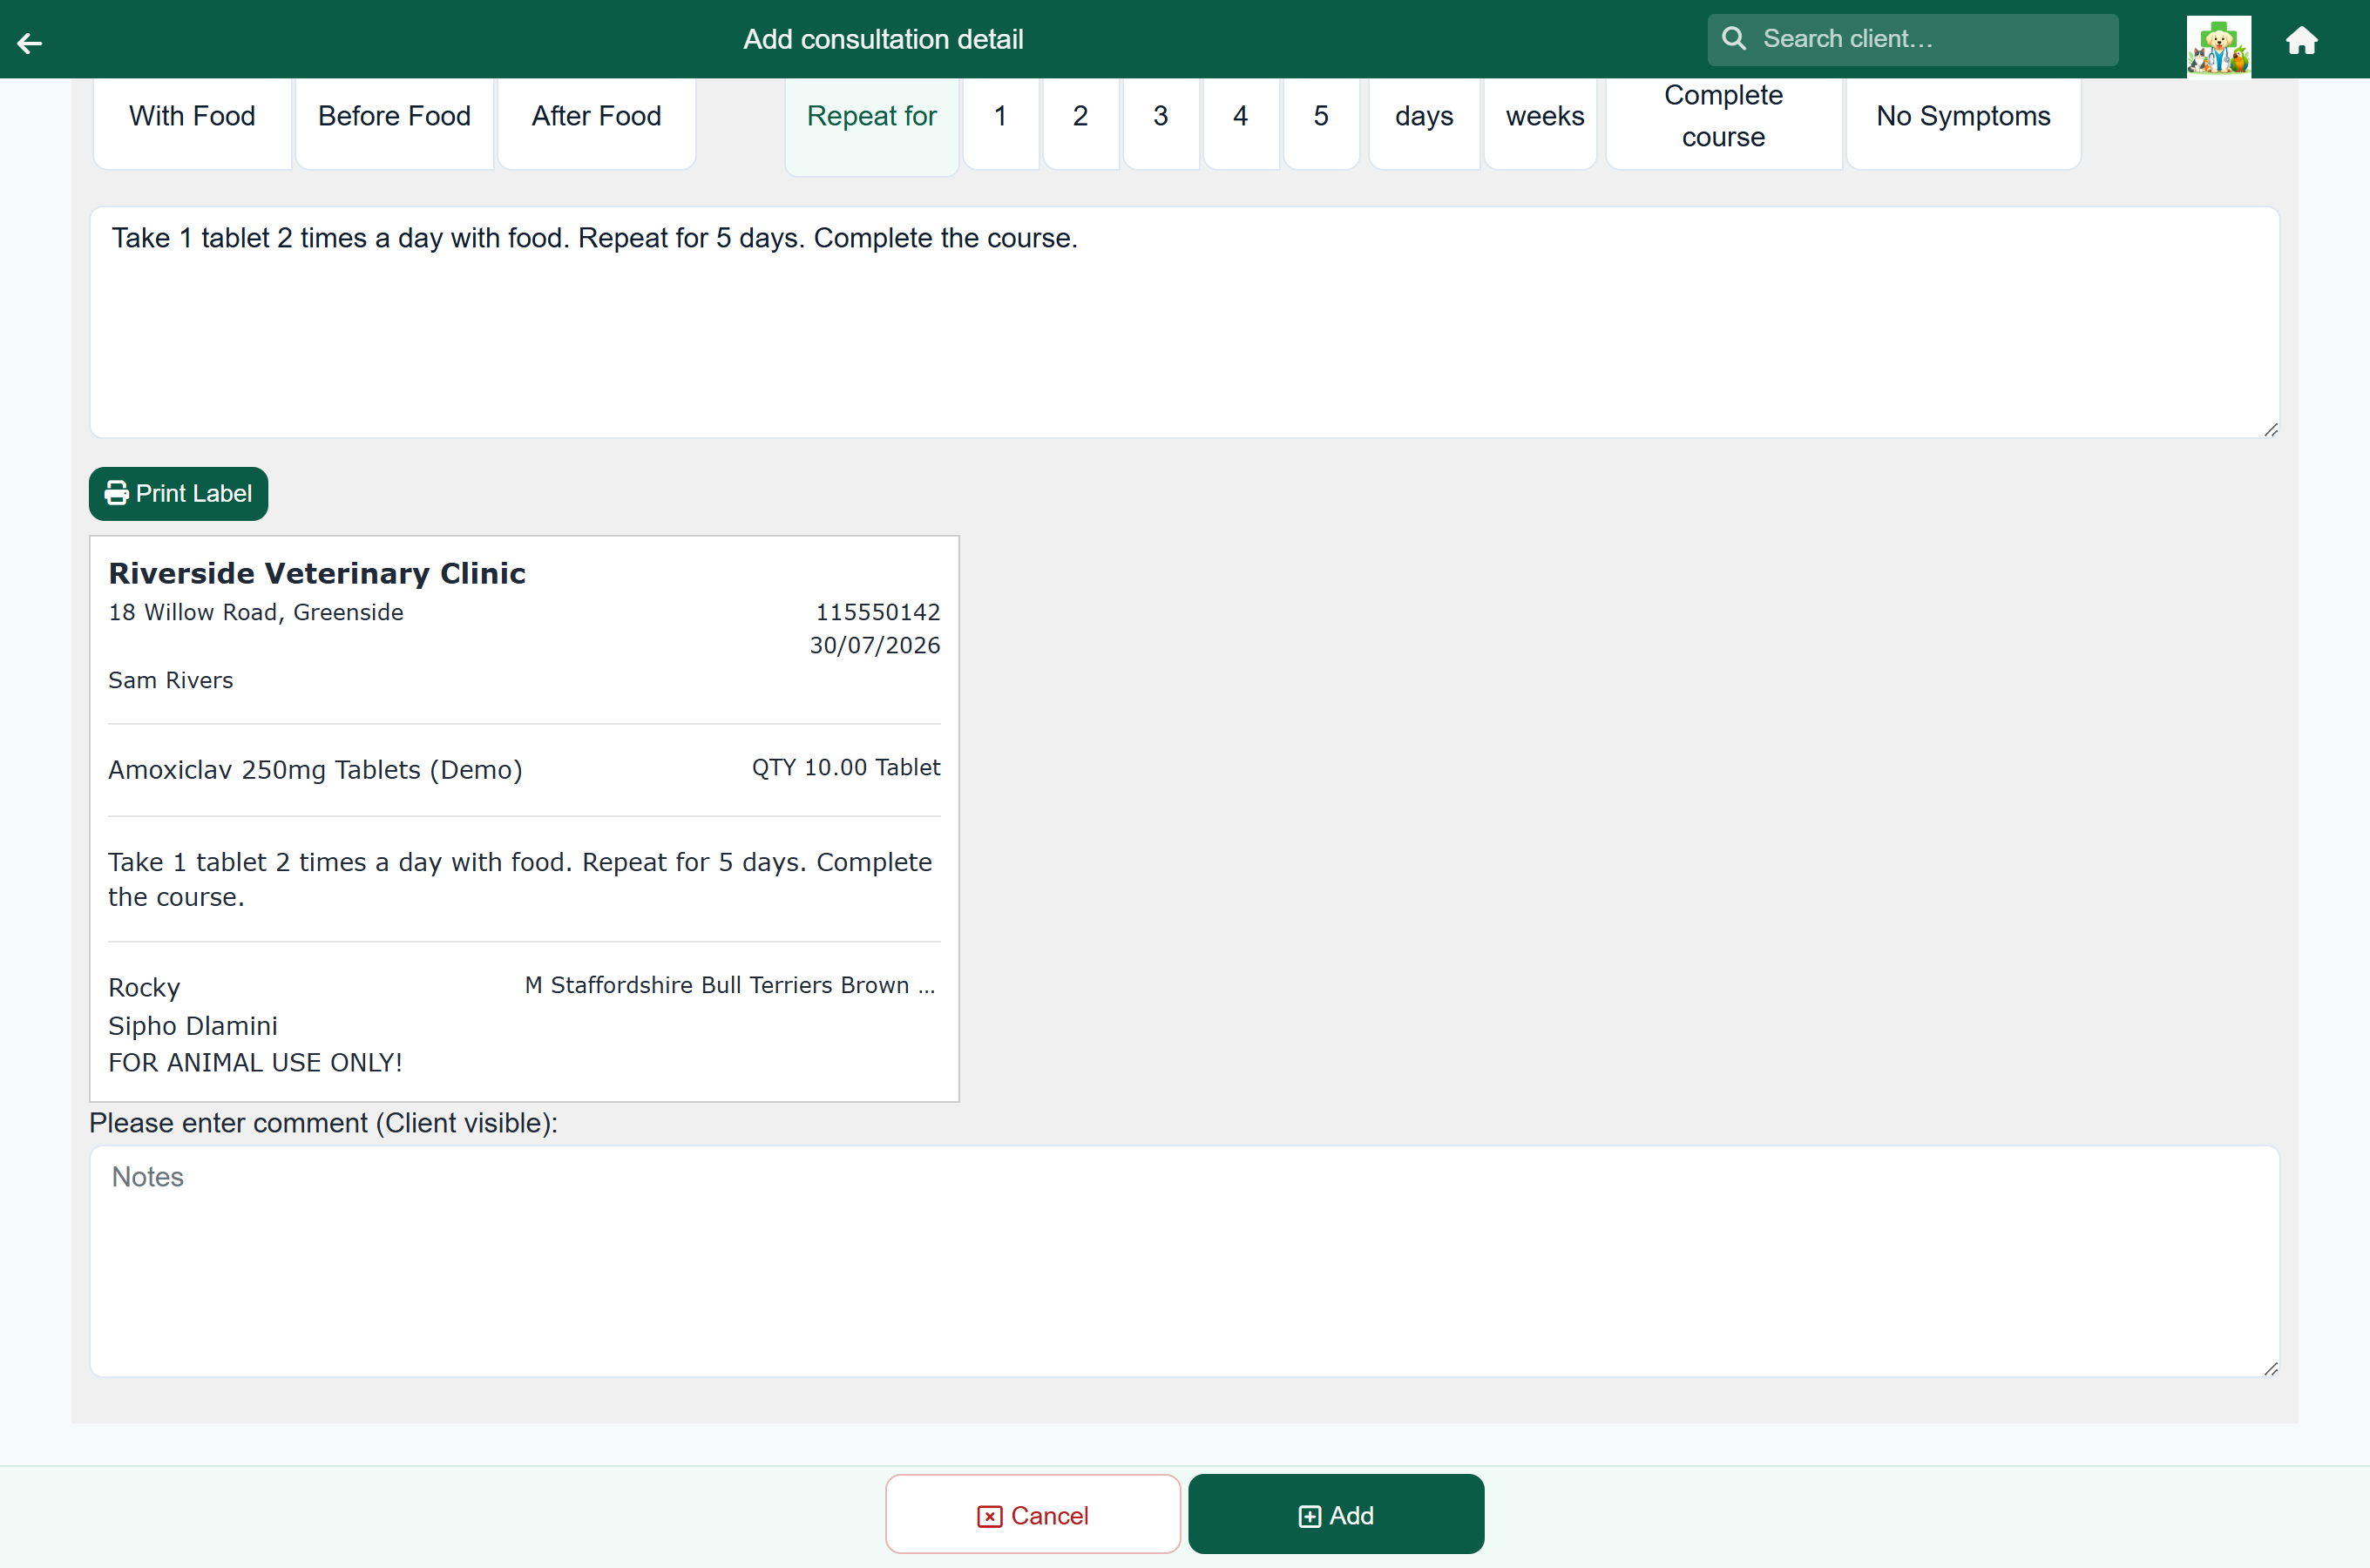
When you charge a Treatment item — tablets, ear drops, an injection to go home with — the item editor adds an Instructions box. Once you have written an instruction, a Print Label button and a preview of the label appear beneath it.
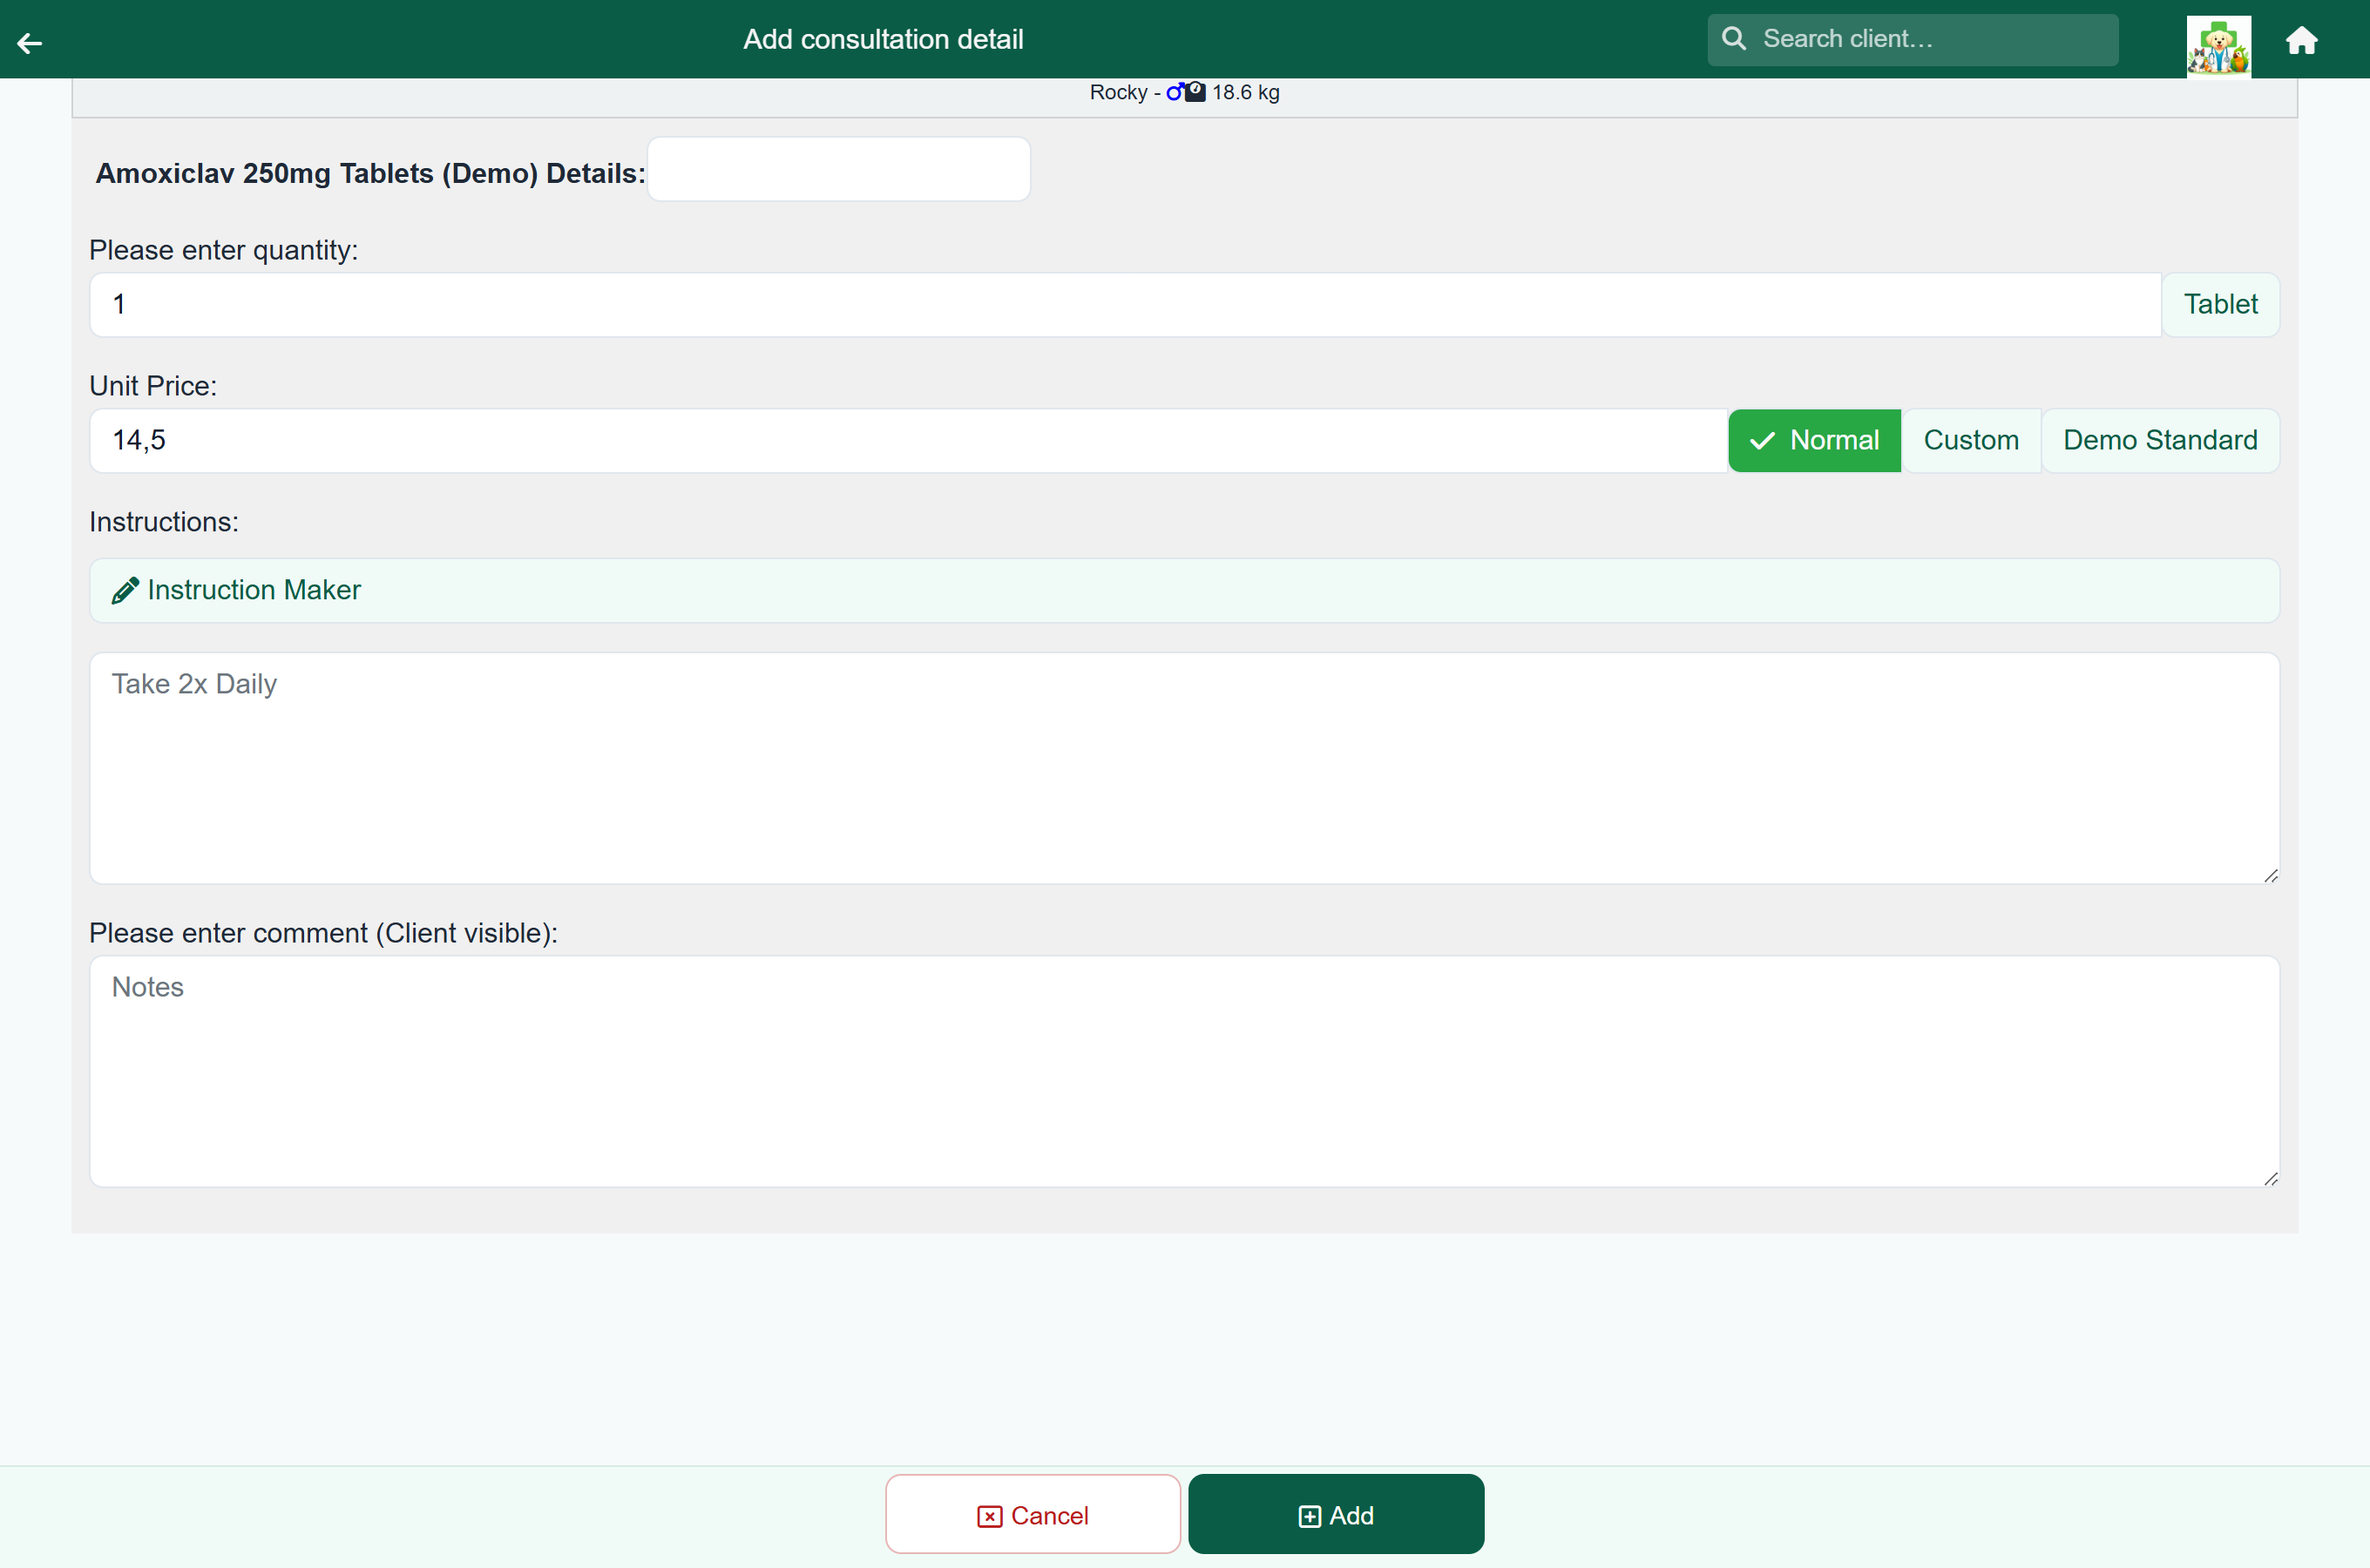
You can type the instruction yourself, or tap Instruction Maker to build it from buttons.
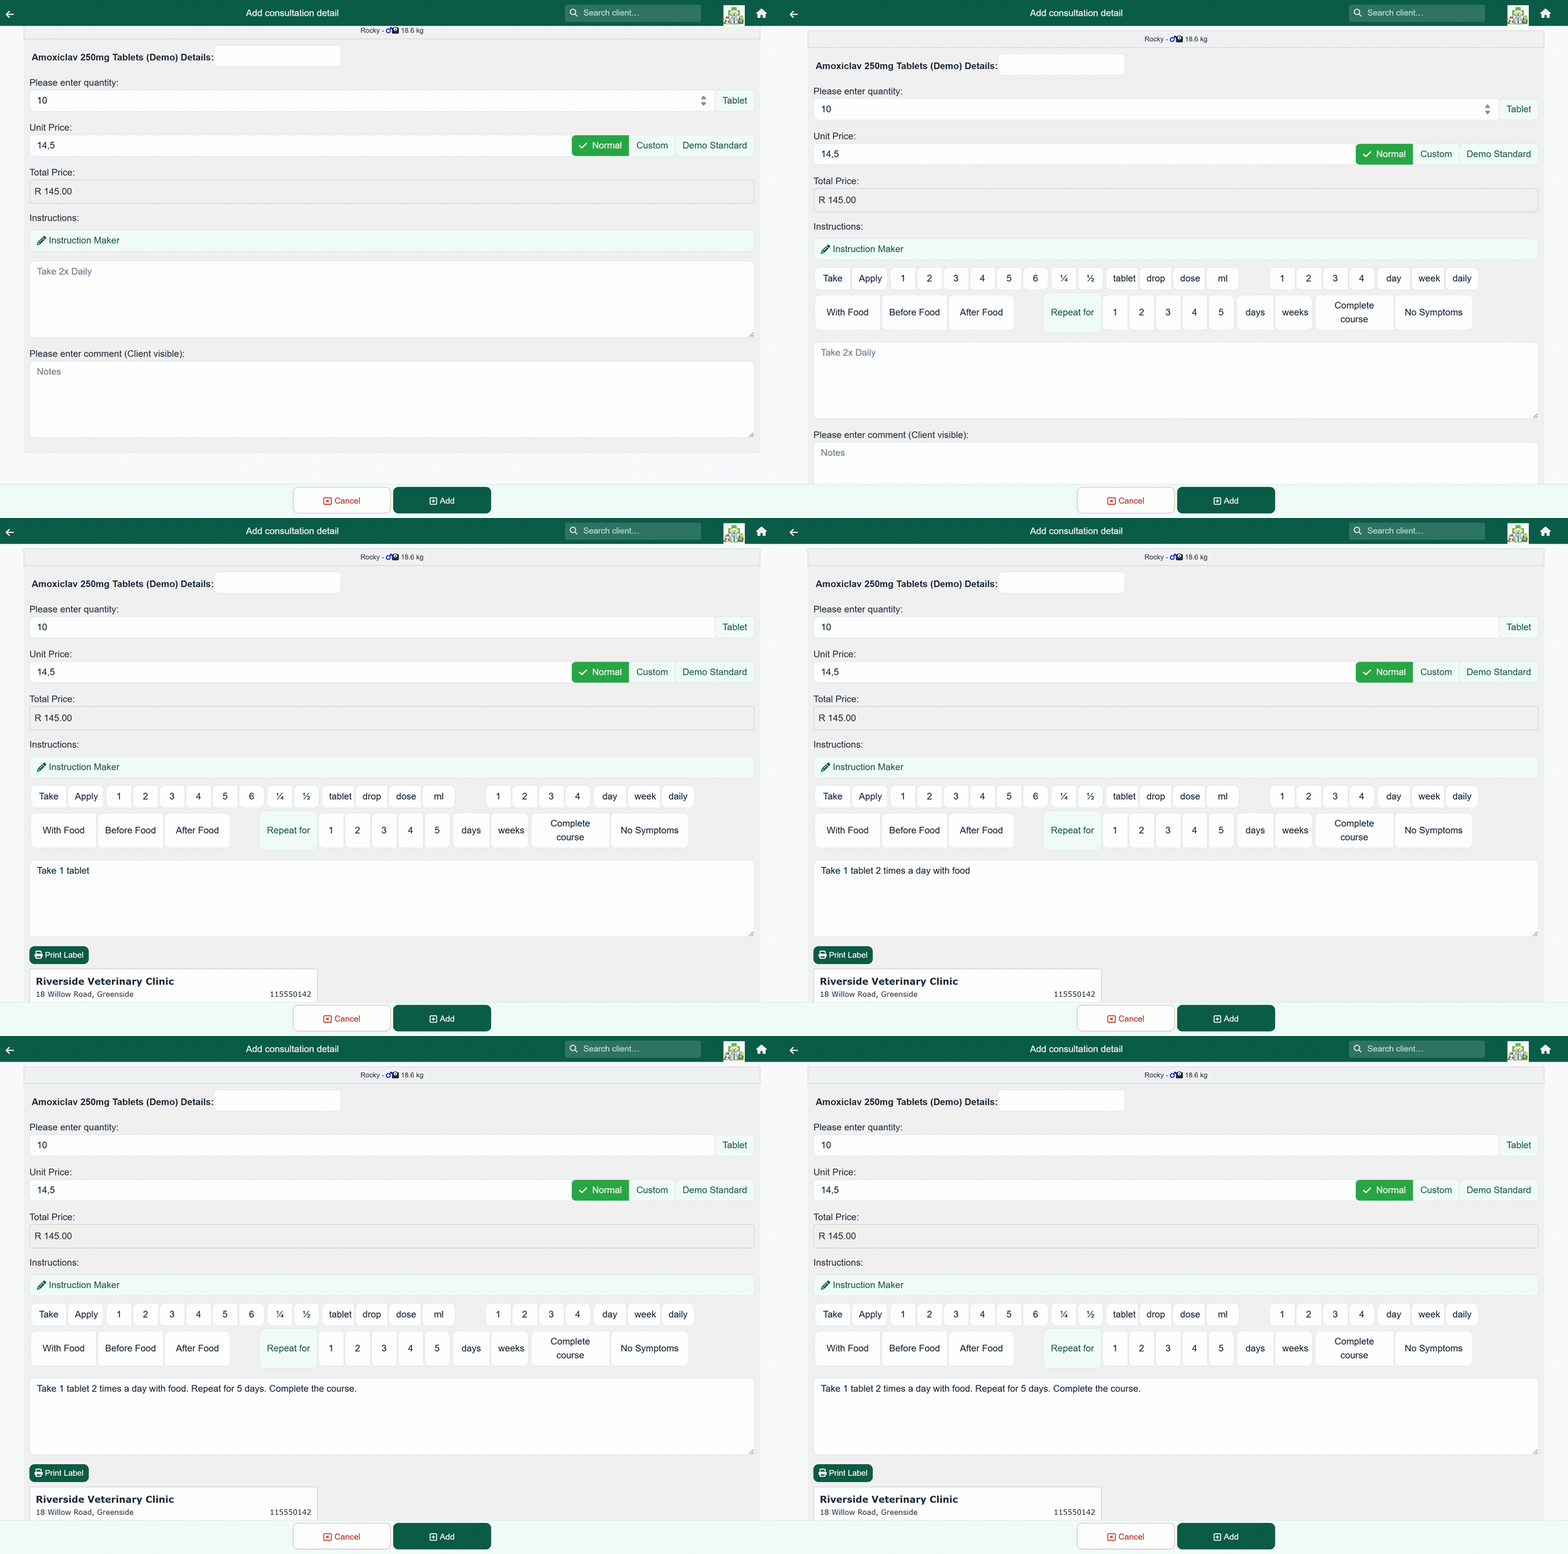
- On the item editor, tap Instruction Maker above the Instructions box.
- Tap along the row: Take or Apply · how many (1–6, or ¼ / ½) · tablet, drop, dose or ml · how often (1–4, then day or week, or just daily) · With Food, Before Food or After Food · Repeat for 1–5 · days or weeks · Complete course or No Symptoms.
- The sentence builds as you tap. Tap a button again to remove it, and edit the text by hand if you need to.
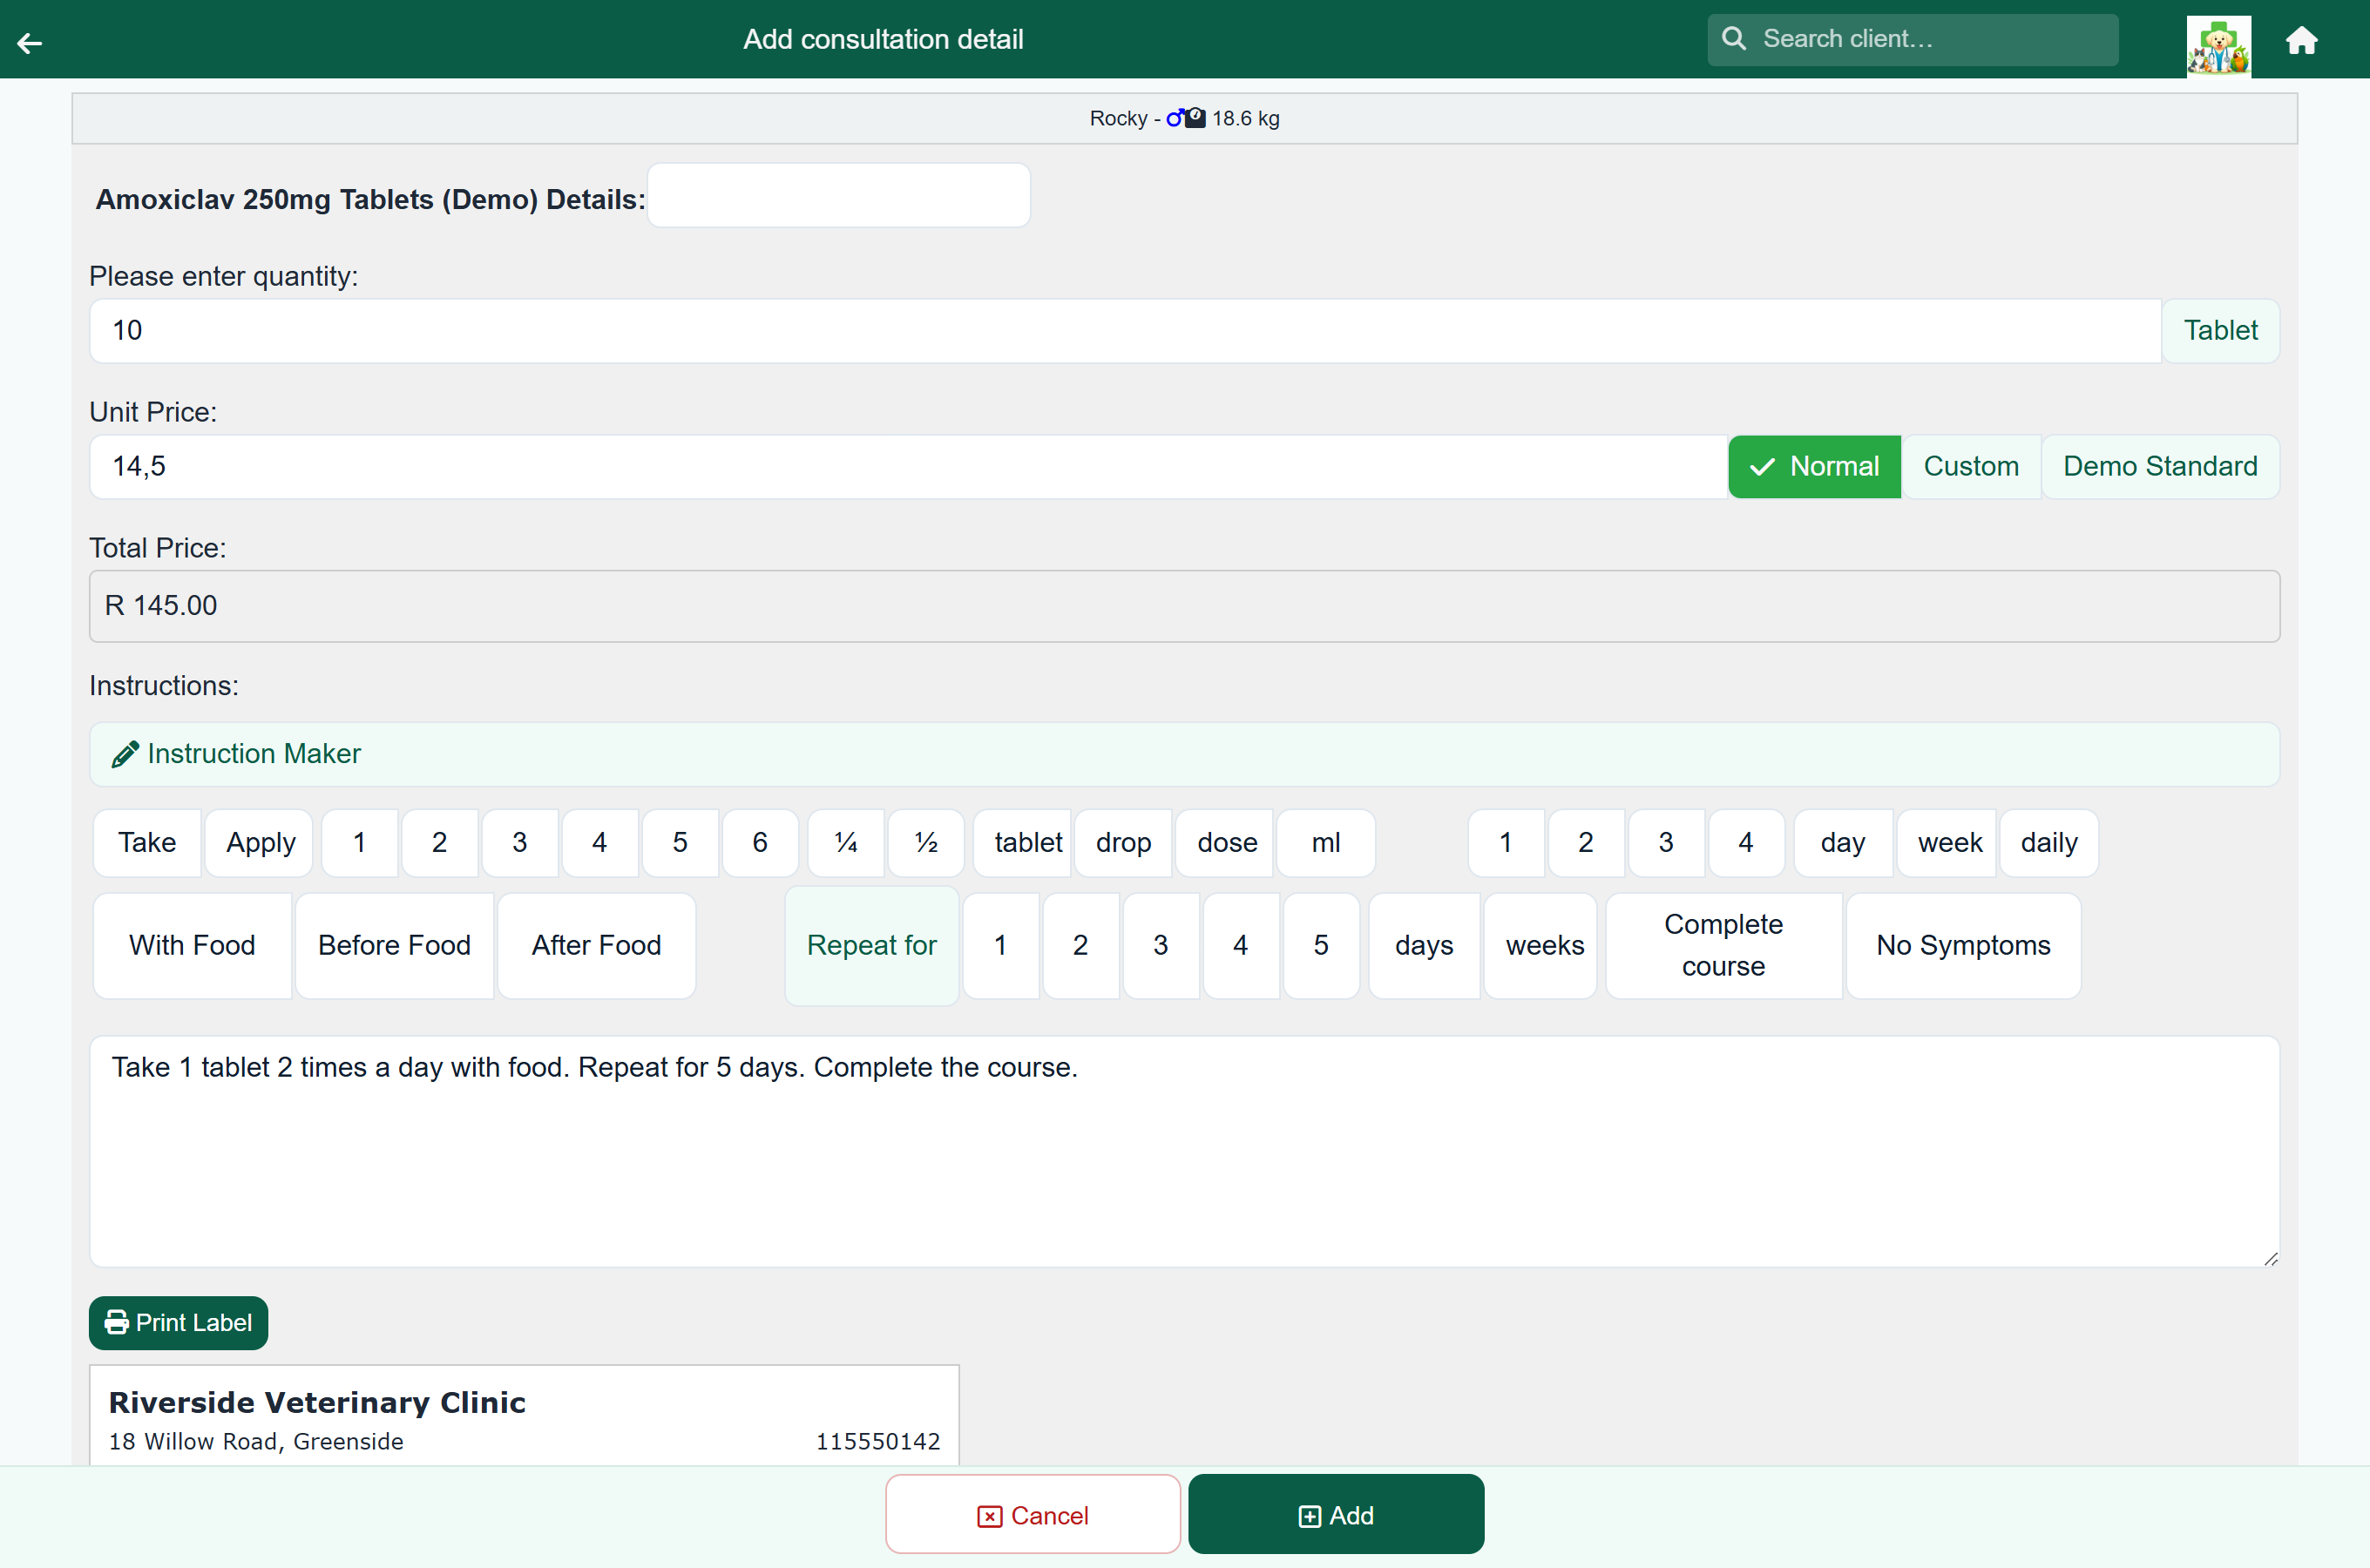
Press Print Label to print the label for the box or bottle. It carries your practice details, the date, who dispensed it, the item and quantity, the instruction, and the patient and owner. What goes on it, the label size and printer setup are covered in Dispensing labels.
Browsing by category#
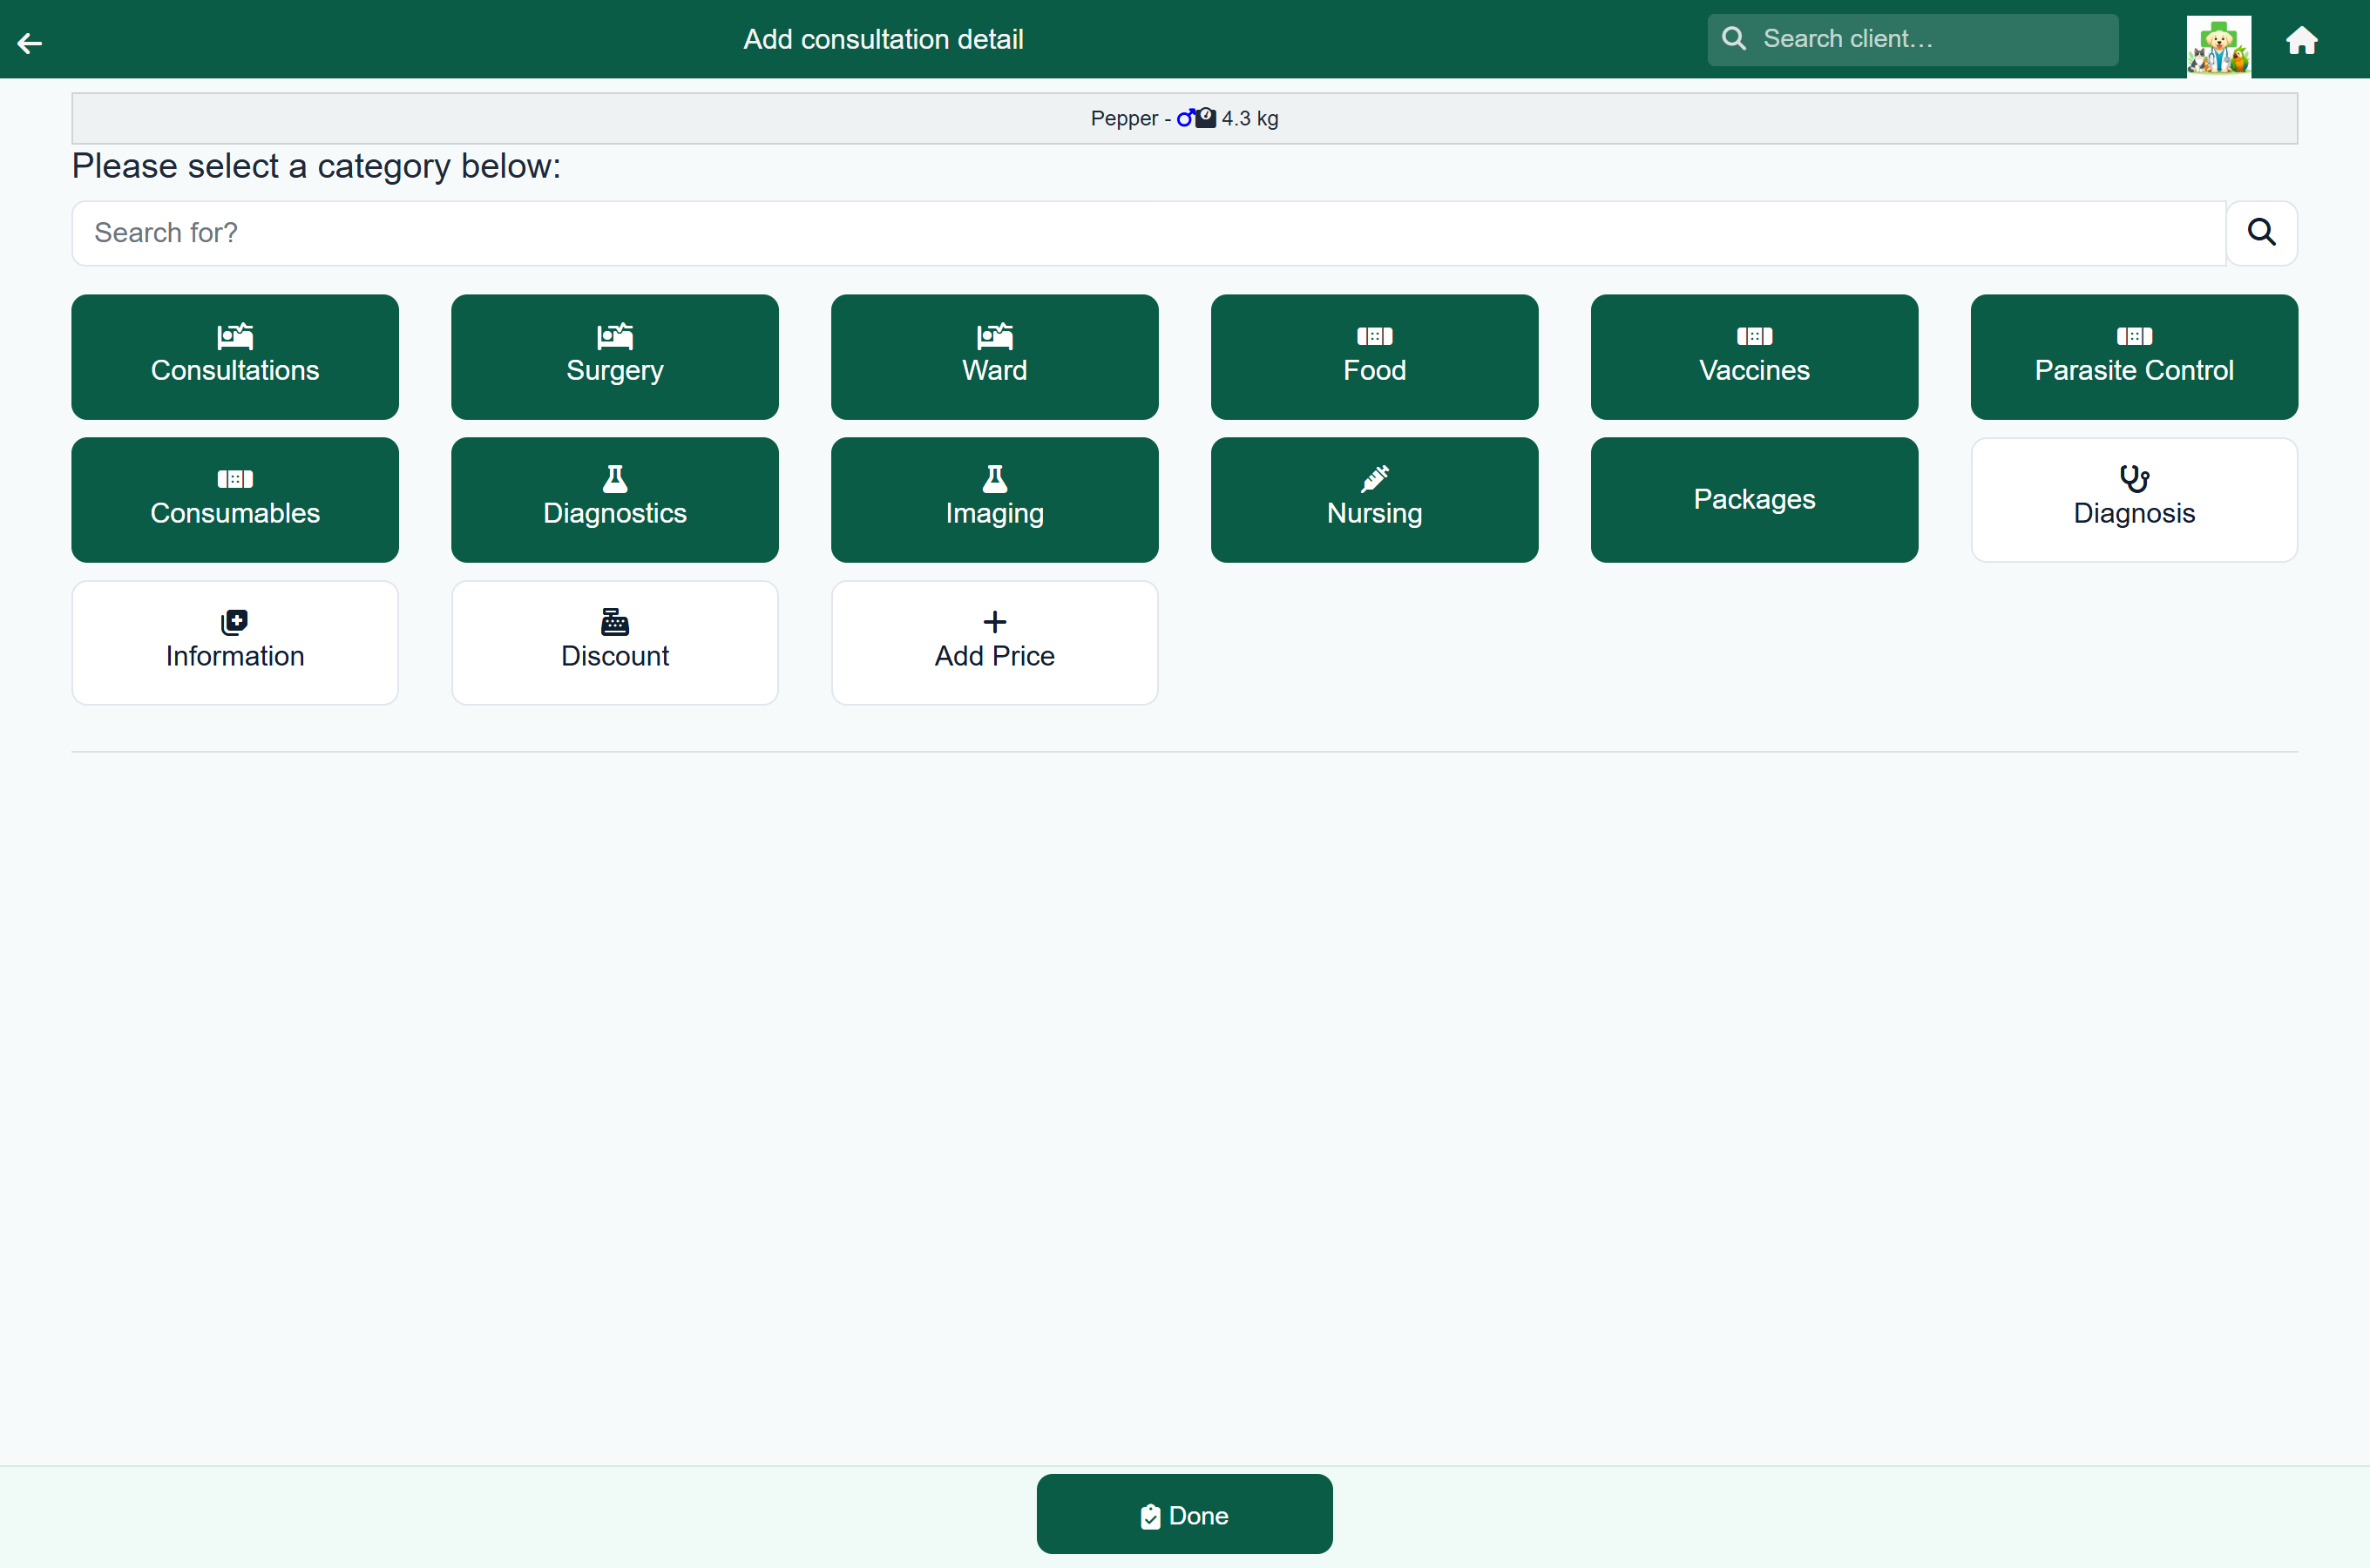
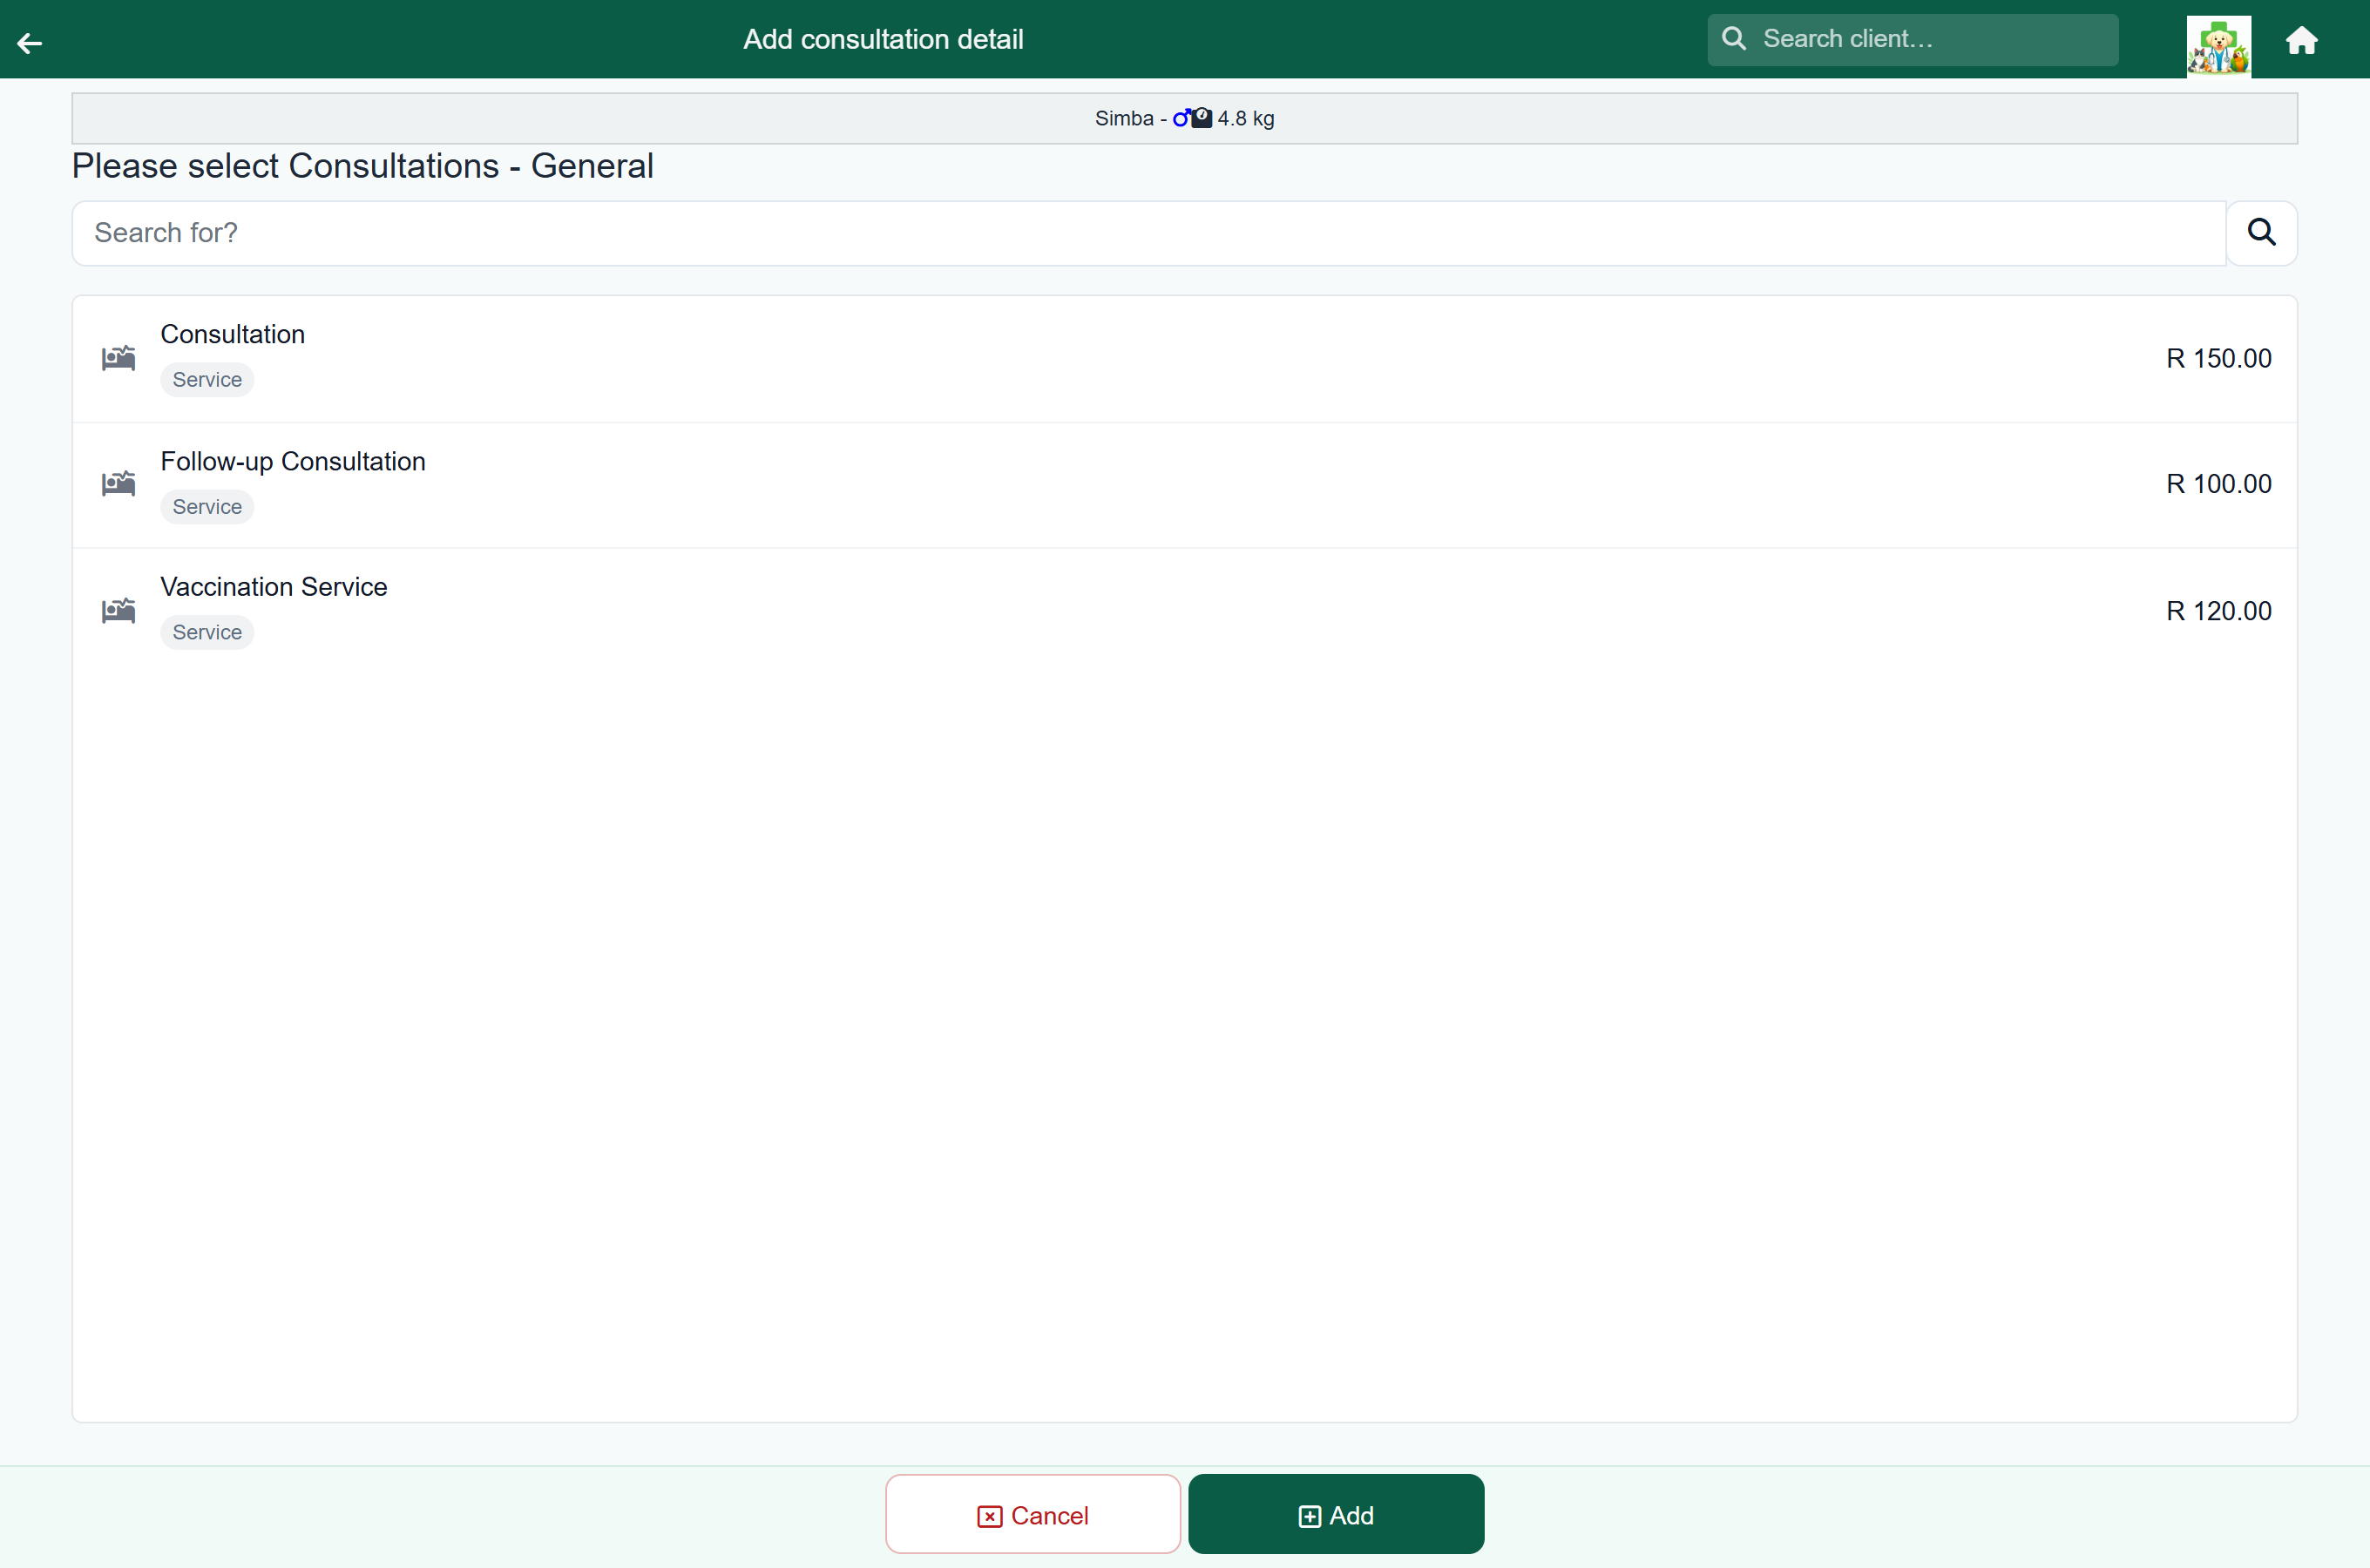
The picker opens on your practice's categories. Choose one to see its subcategories, then choose a subcategory to list its items. Where a category has only one subcategory, the picker goes straight to its items.
Alongside the categories are a few shortcuts. Which ones you see depends on where you opened the picker and on your role:
| Shortcut | What it does | Shown on |
|---|---|---|
| Diagnosis | Adds an entry to the patient's diagnosis list. | Consultations |
| Information | Attaches one of your practice's discharge sheets to the visit. | Consultations, hospital and boarding days, grooming and sales |
| Discount | Applies a discount line. | Consultations and grooming |
| Add Price | Creates a one-off charge that is not in the catalogue. | Consultations, administrators only |
| Vitals | Opens the vitals editor for the day. | Hospital and boarding days |
Correcting a line you have already charged#
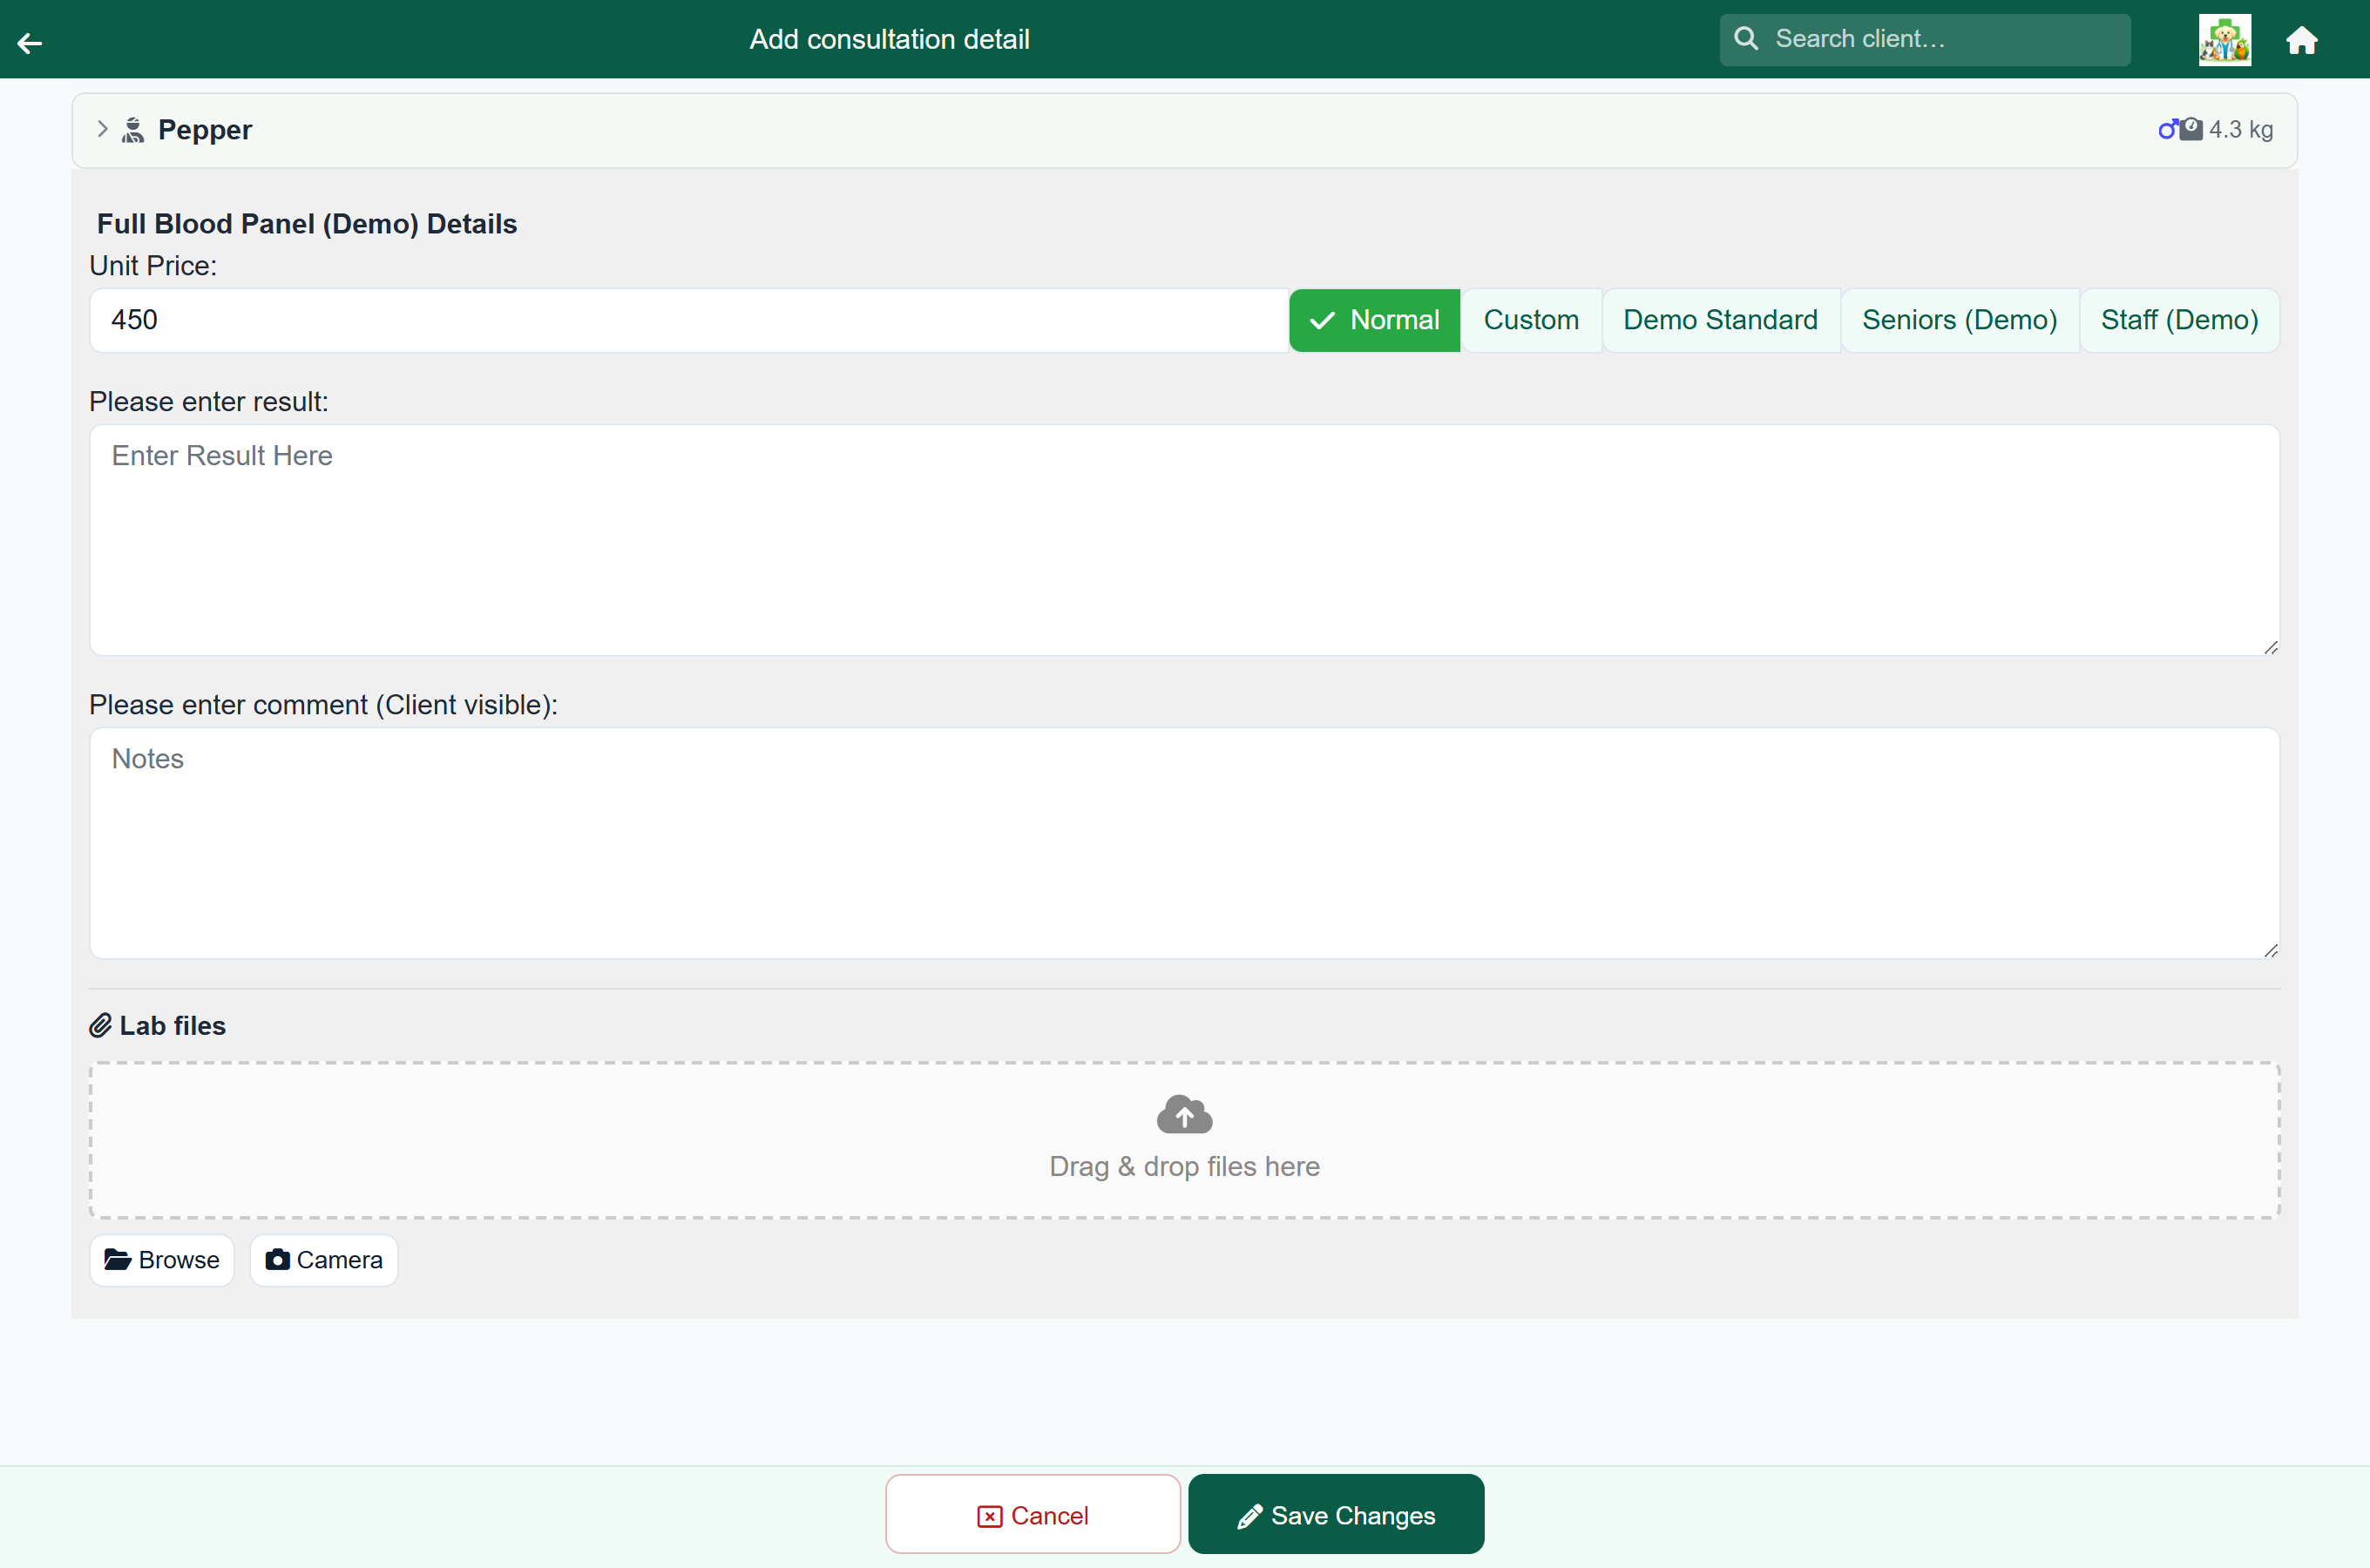
Tap any line in the items list to reopen it. You can change the quantity, price, lab result, client-visible comment or dispensing instruction without deleting the line and charging it again.
- Tap the line in the items list.
- Change what needs changing.
- Press Save Changes in the footer. Cancel leaves the line as it was.
Recording vitals#
Vitals are recorded against the visit and feed the trend charts in the patient's clinical history.
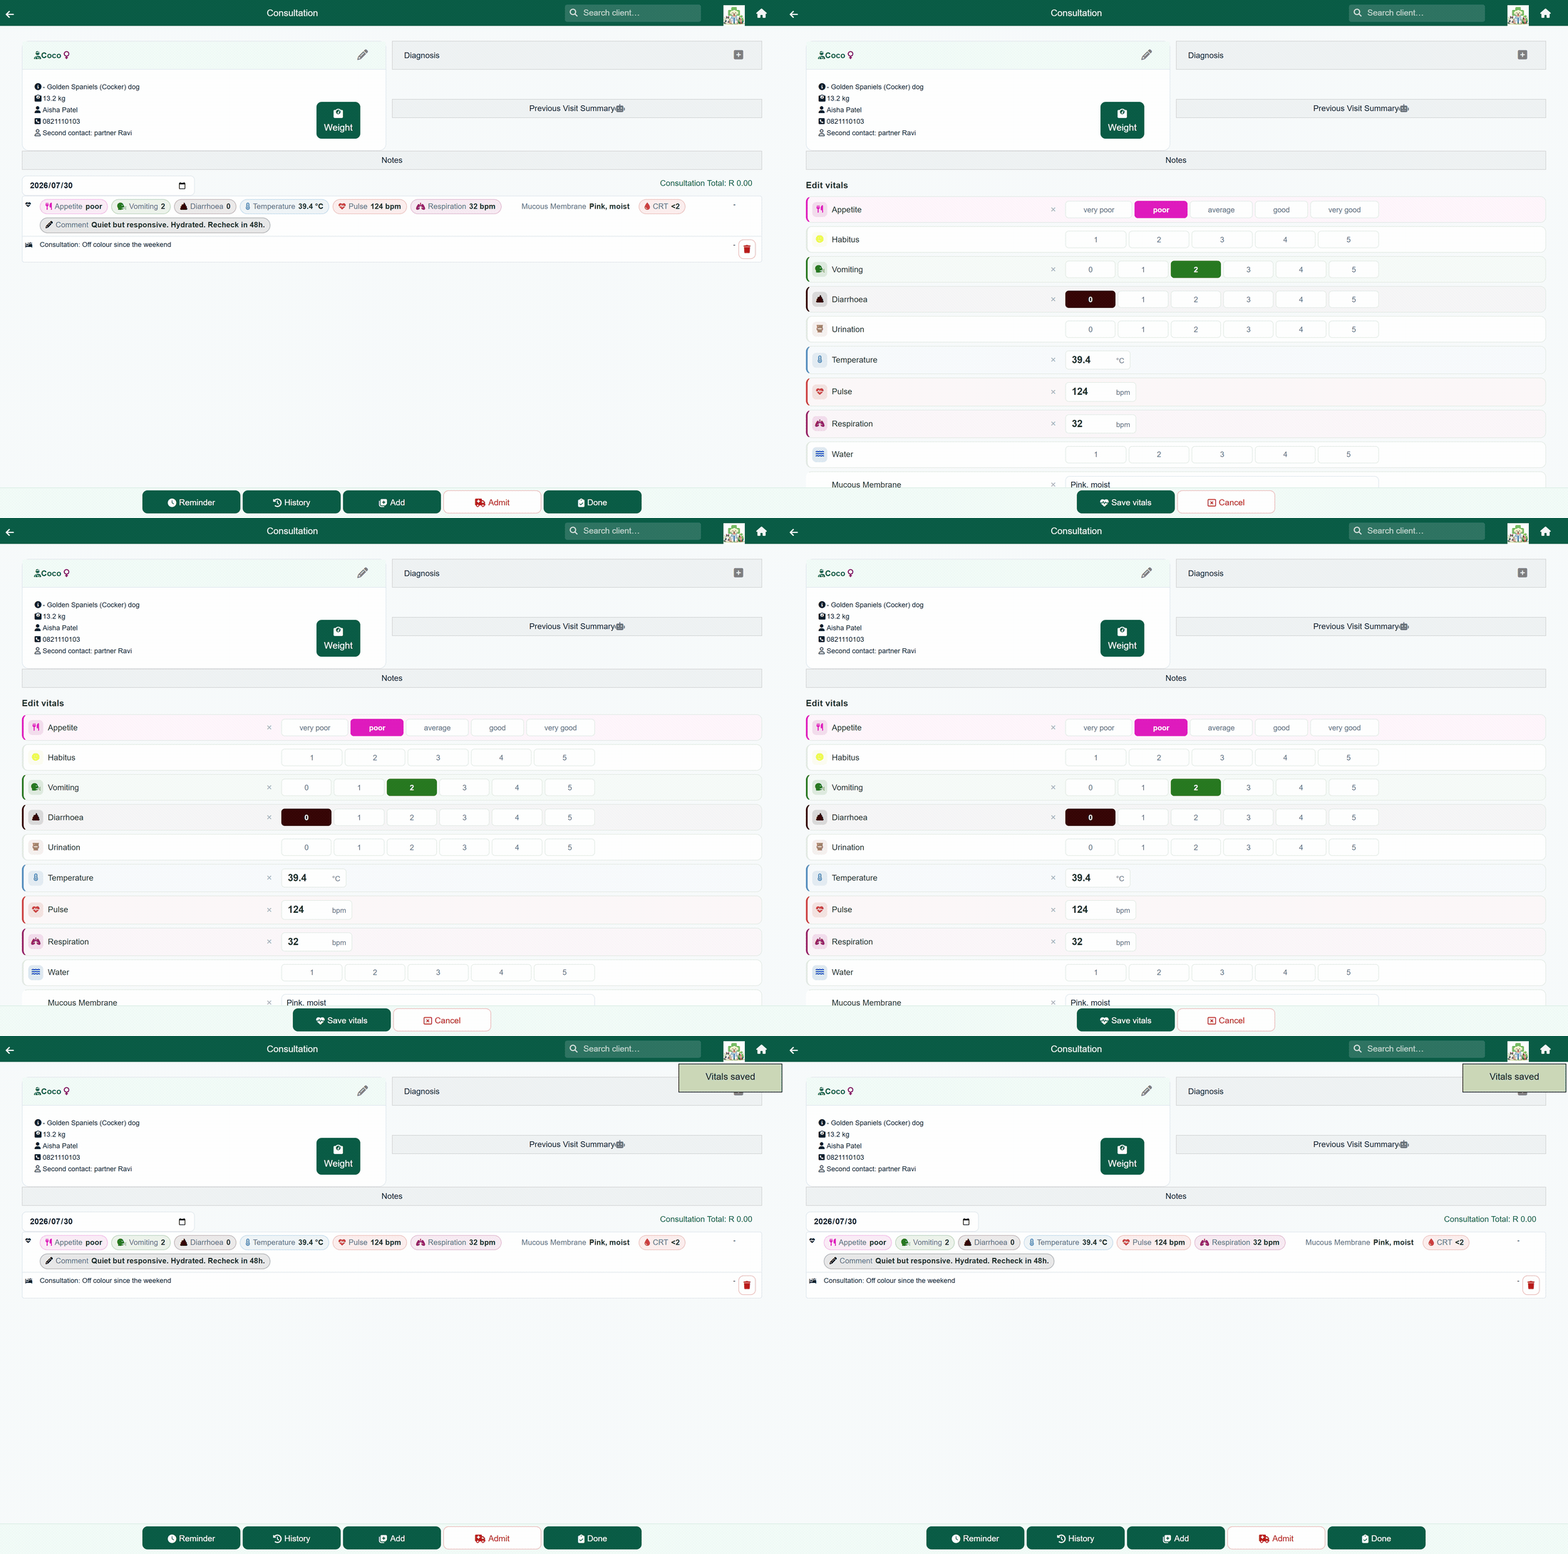
- On the invoice, tap the readings row at the top of the items list. If nothing has been recorded yet, it is an empty row with a heartbeat icon.
- Enter the readings you took. Which vitals appear, and how each is entered, is set under Settings → Vitals.
- Press Save vitals in the footer, or Cancel to leave without saving.
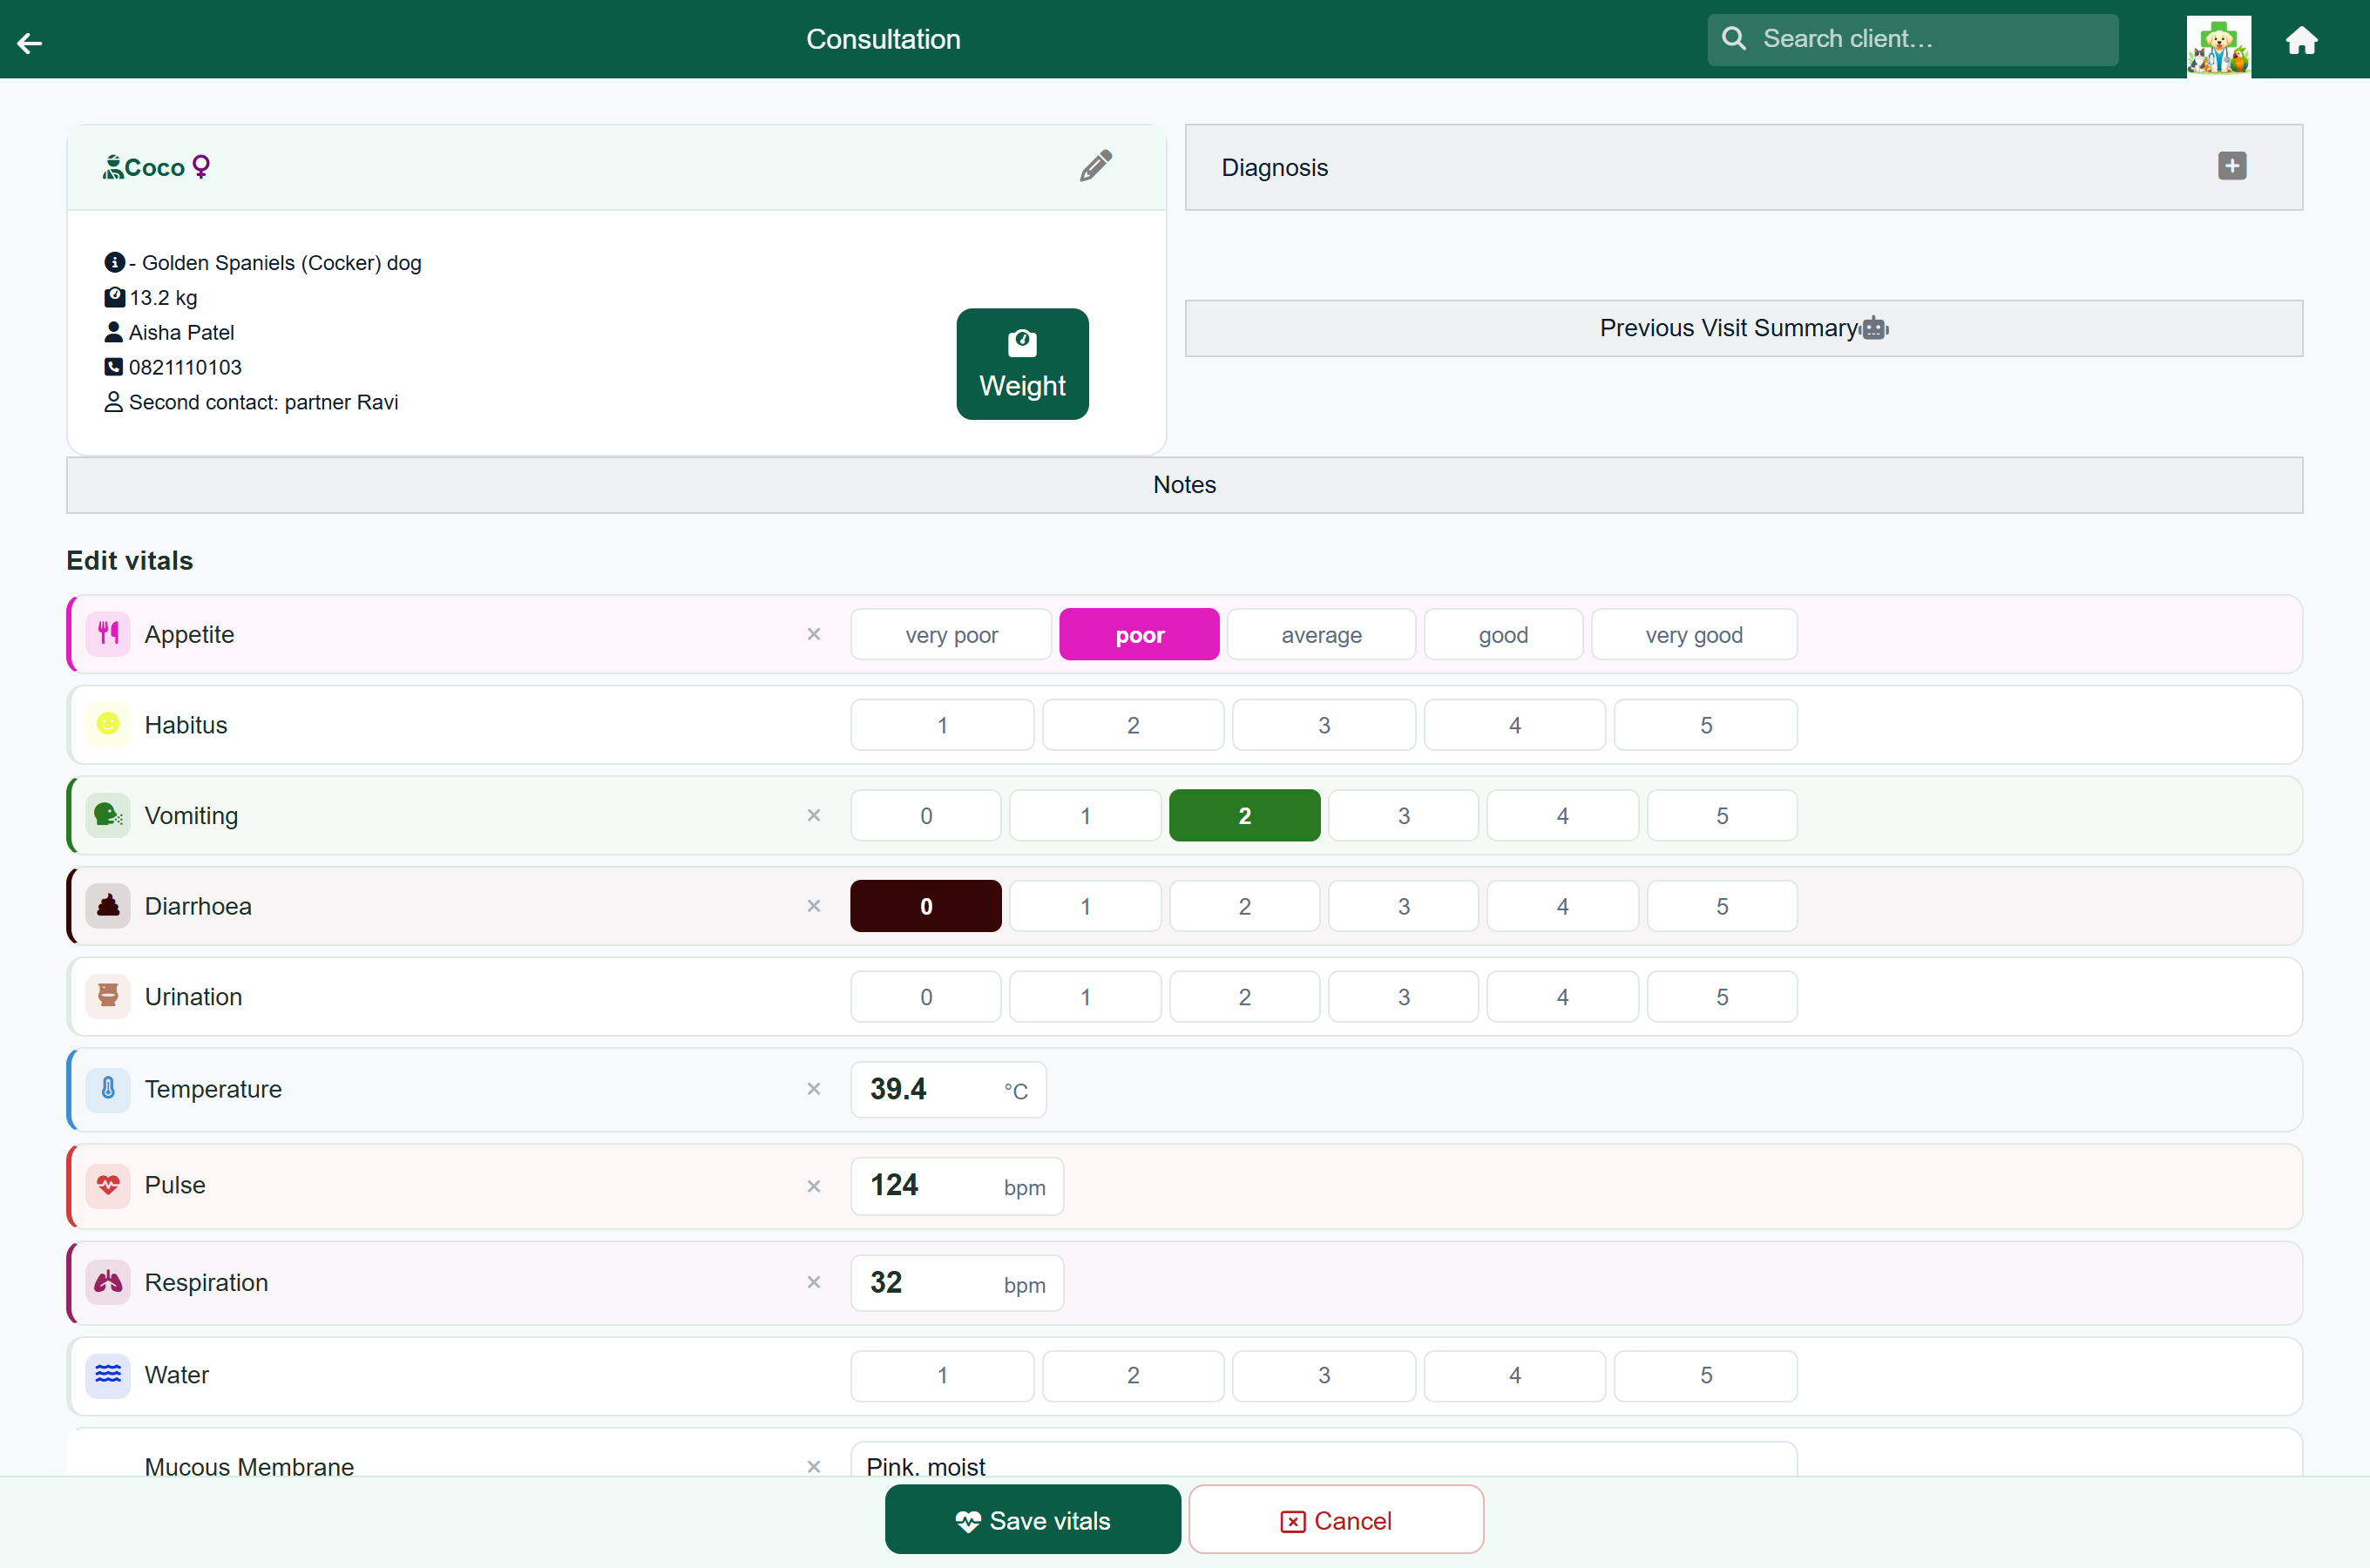
While the editor is open, the items list and the other footer buttons are hidden. Saved readings show as coloured pills in the readings row; tap the row again to correct them.
Clinical notes#
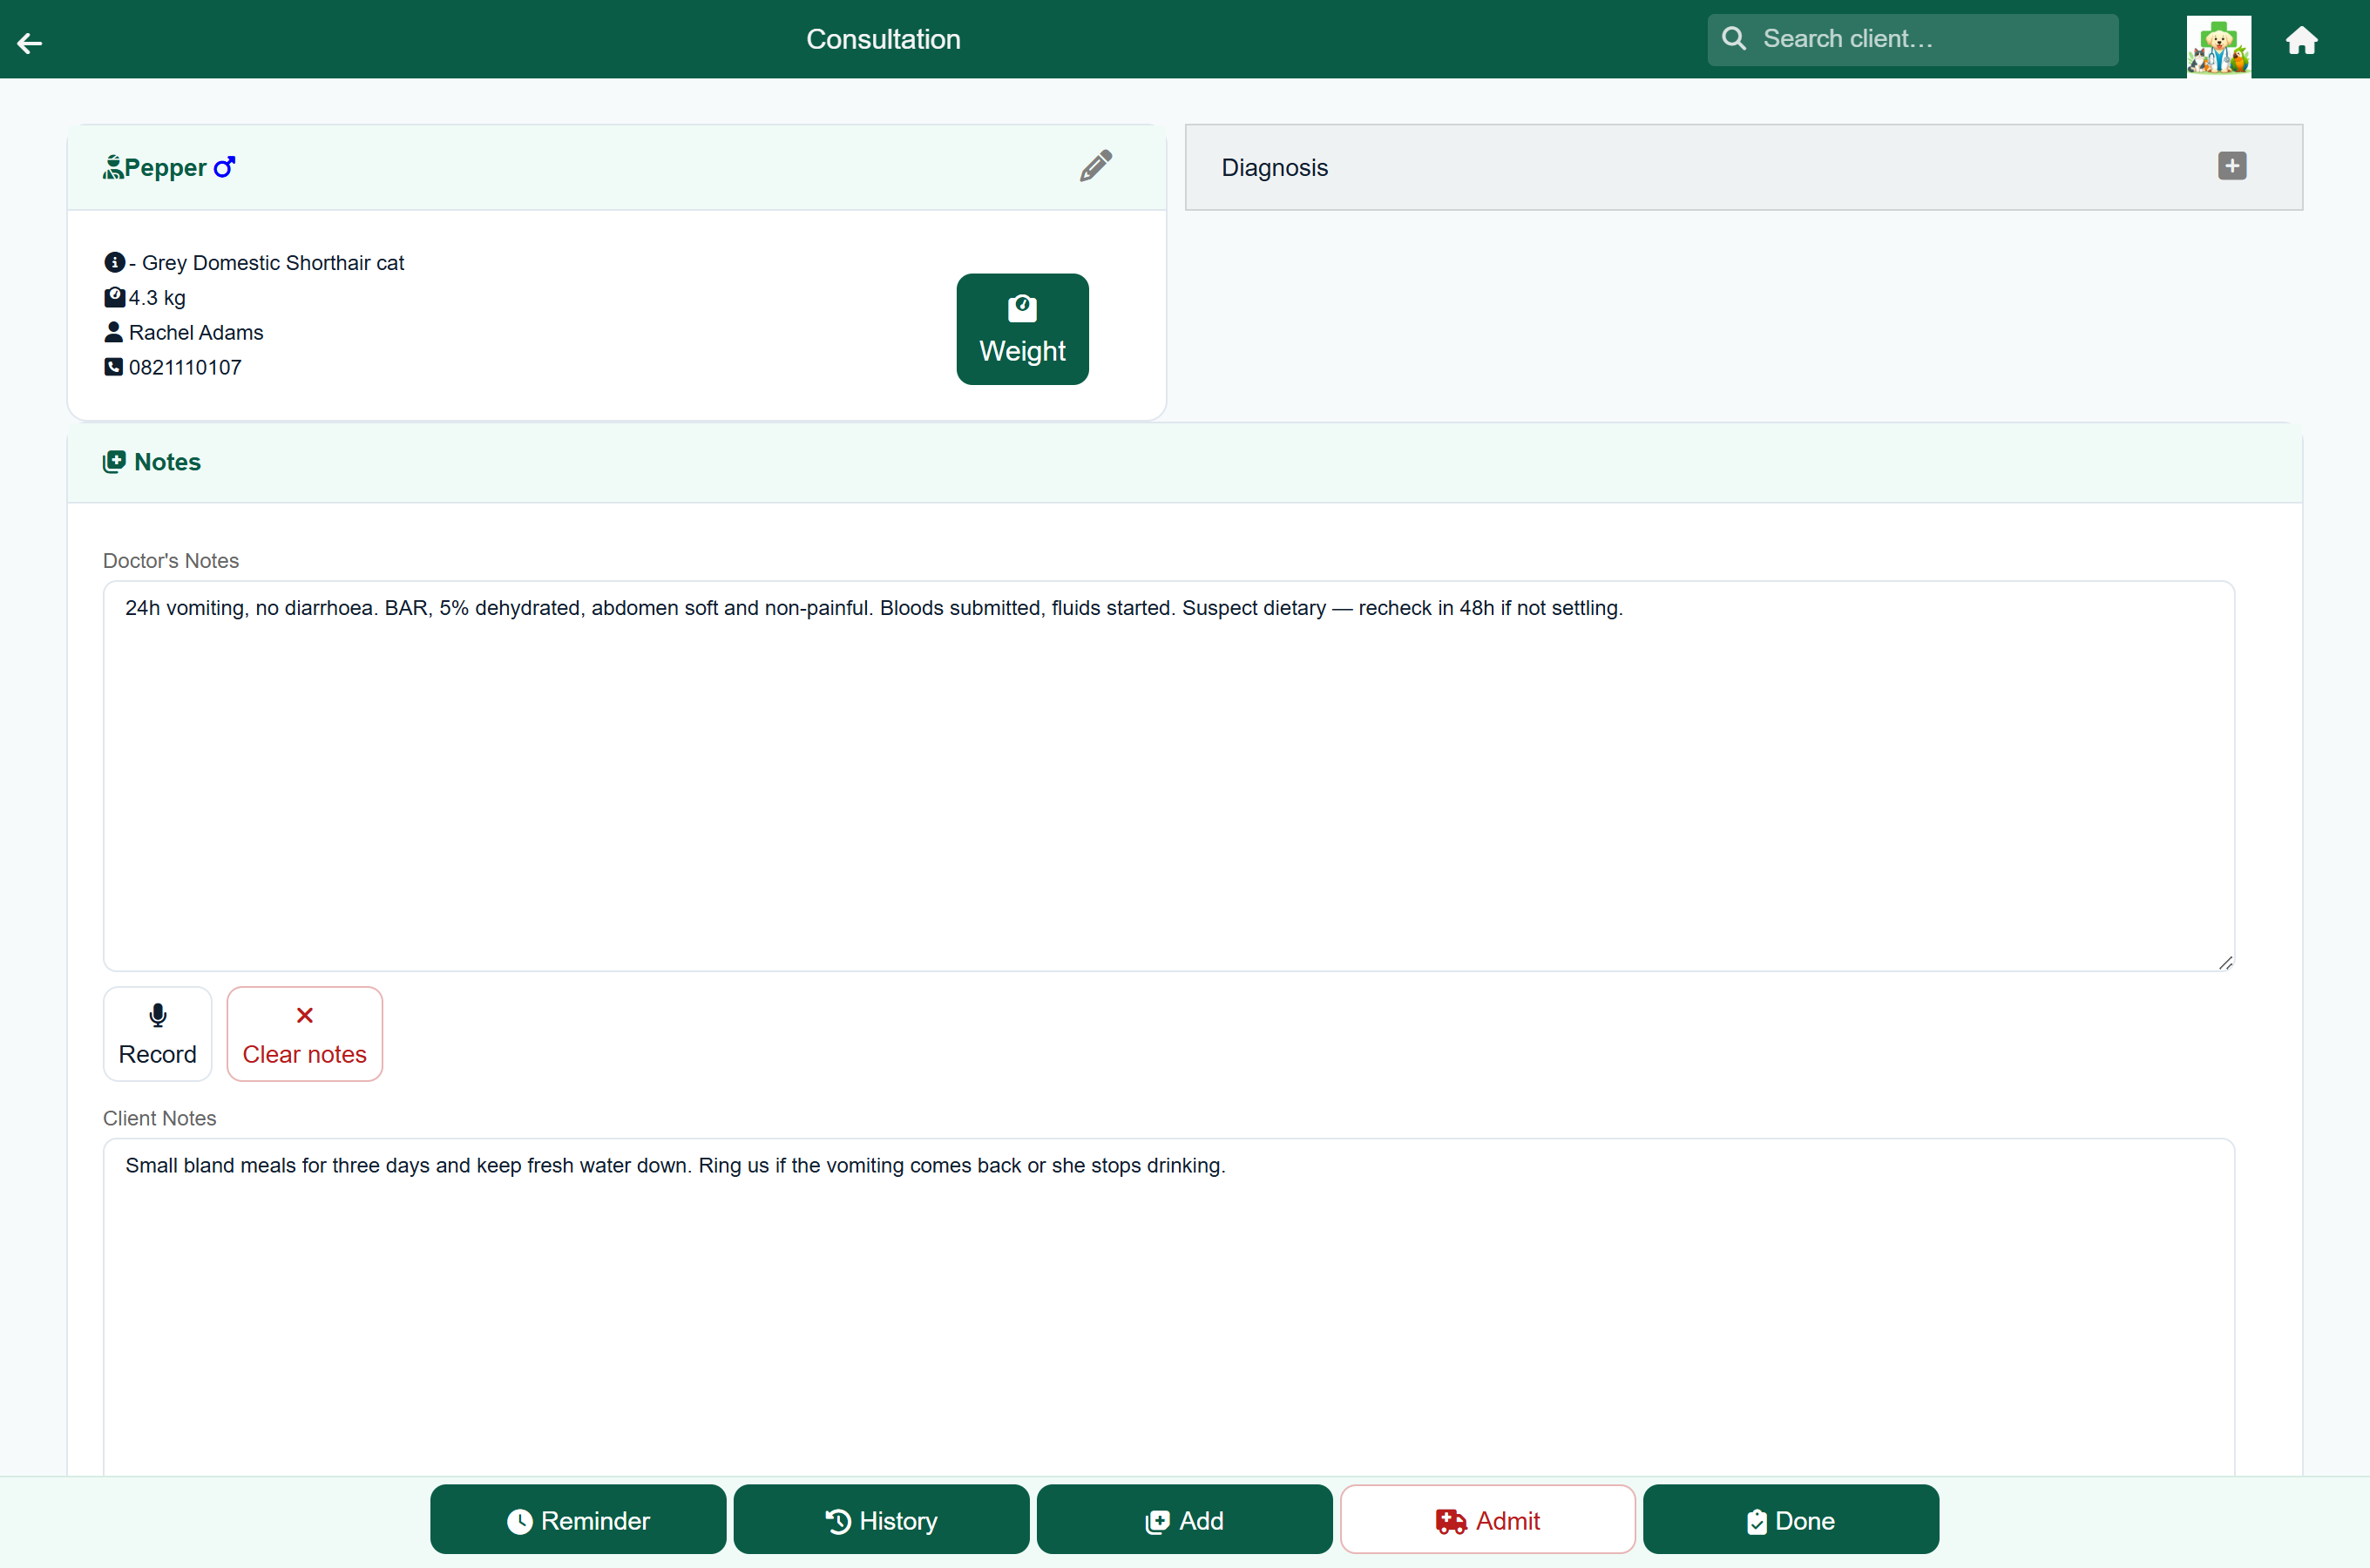
The Notes section holds two notes. Tap a note — its text, the empty line or the pencil — to edit it. It saves as you type, and closes when you press Save or tap away.
| Note | Who reads it | What belongs in it |
|---|---|---|
| Doctor's Notes | Staff only. | The clinical record — history, findings, differentials, your reasoning and the plan. |
| Client Notes | Staff and the client. | What the owner needs to take home: how to give the medication, what to watch for, when to come back. |
If your practice has AI features, a third note, the AI Note, sits between them. Its Record button records the consultation and writes a note into the AI Note for you to read and correct. It is internal, like Doctor's Notes. See Voice notes & AI summaries.
Tap the Notes heading to fold the section away. When folded, it shows which notes have something in them. FastVet remembers the choice until you close the browser.
Diagnosis#
The Diagnosis panel is the patient's standing problem list, not a note for this visit alone. Entries stay on the patient, and show under the patient on the client's account, until somebody removes them — so use it for “chronic kidney disease”, not “vomiting today”.
- Press the + on the Diagnosis panel, or Diagnosis in the price picker.
- Type the diagnosis in your own words.
- Press OK.
The panel shows how many entries there are. Tap an entry to change its wording, use the expand icon to see the full list, and use the button beside an entry to remove it once it has resolved.
Protocols and packages#
A protocol is a bundle — a puppy vaccination course, a dental package — that adds several items at once.
A protocol is billed as one line, at the Protocol Charge. The items inside it are recorded against the visit, so stock is taken off and the clinical record is complete, but they are not billed separately and appear underneath without prices.
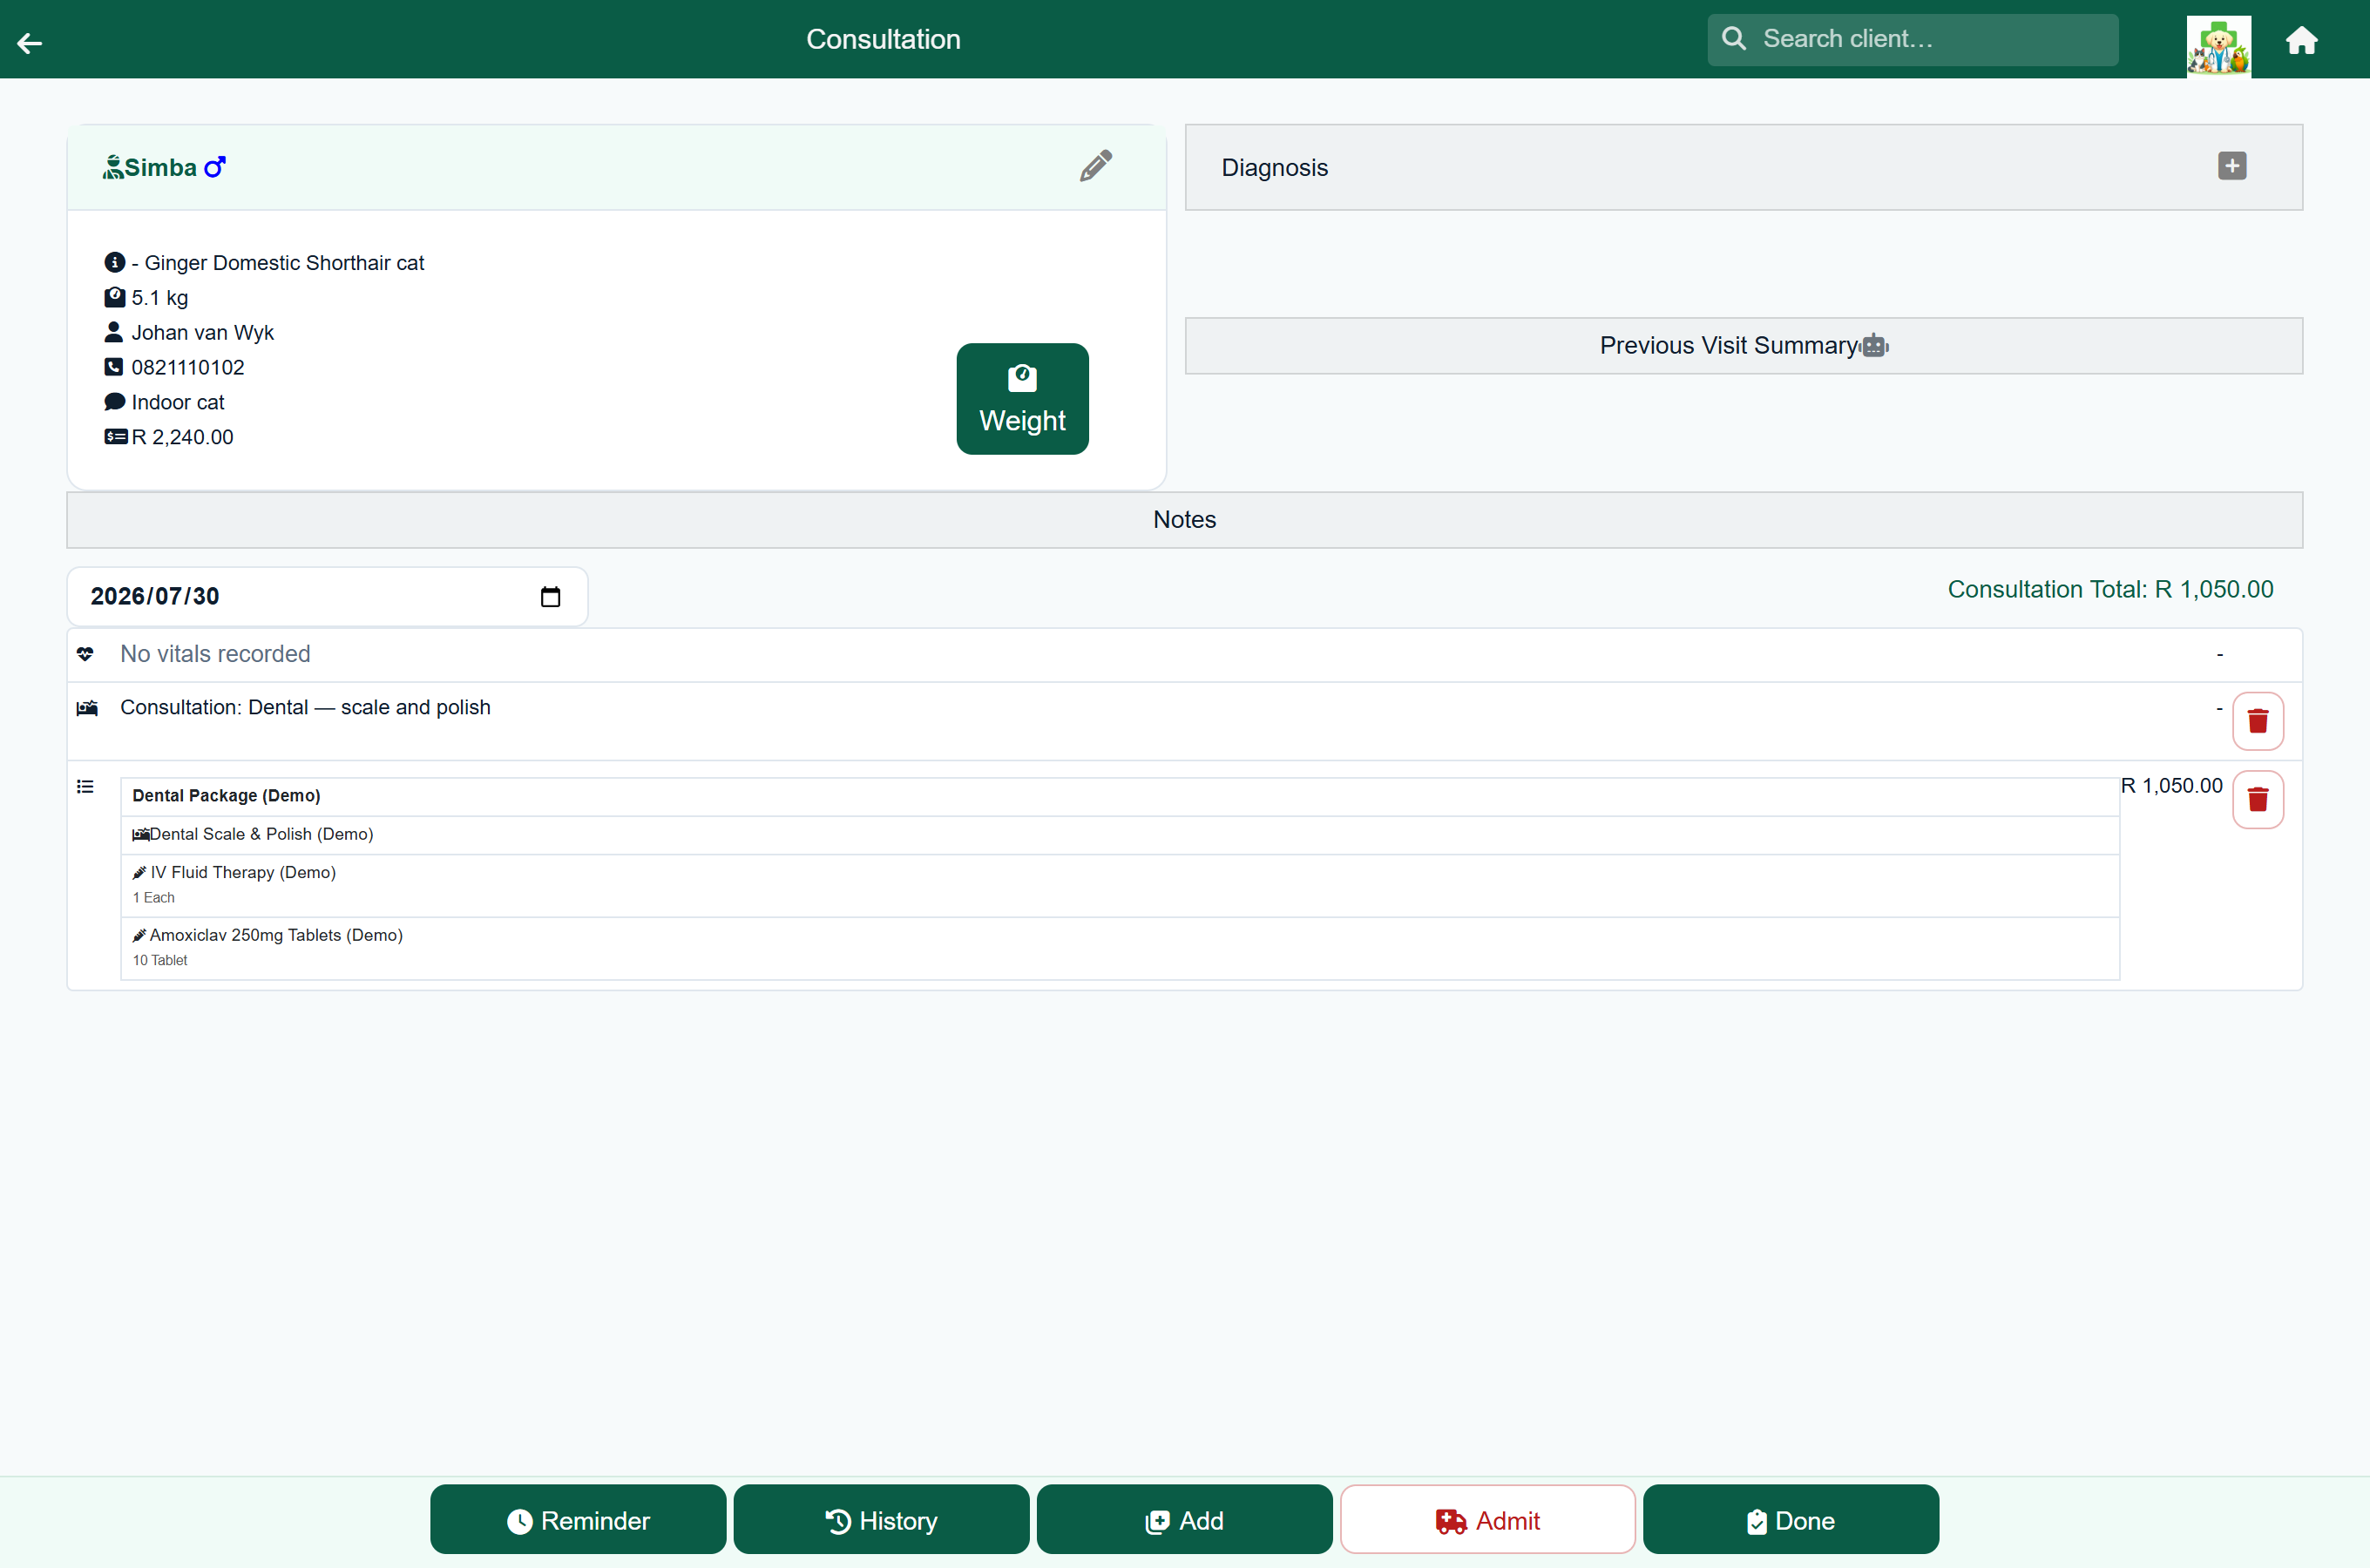
- Search for the protocol and pick it. A Protocol Summary opens instead of the usual item editor.
- Set each item's quantity to what you actually used. Set anything you did not use to 0.
- Check the Protocol Charge: Normal is the package price, Custom lets you type a price, and Calculated charges the total of what you used.
- Press Add Protocol.
Attaching a discharge sheet#
Your practice keeps a set of aftercare sheets — post-operative care, a diet sheet, what to expect after a vaccination. Attach one to the visit to give it to the client.
- Press Add to open the price picker.
- Choose Information, alongside the categories.
- Pick the sheet.
Attached sheets are listed under Discharge sheets, below the invoice. From there:
| Action | What it does |
|---|---|
| The eye button, or tapping the name | Opens the sheet to read or print. Only shown where the sheet has a document attached. |
| The bin button | Removes it from this visit. The sheet itself stays available for other visits. |
Setting a reminder#
Reminder in the footer schedules a future reminder for this patient — next year's vaccination, a recheck, the end of a course of treatment. Once the visit has one, the button shows the count, for example Reminder (1), and the reminders are listed below the invoice, where you can open or delete them.
- Press Reminder.
- Choose what the reminder is for and the date it is due.
- Save.
Due reminders are collected on the reminders screen, and your practice can have FastVet email them automatically.
Checking history mid-visit#
History in the footer opens the patient's full clinical history. Press back to return to the consultation exactly as you left it.
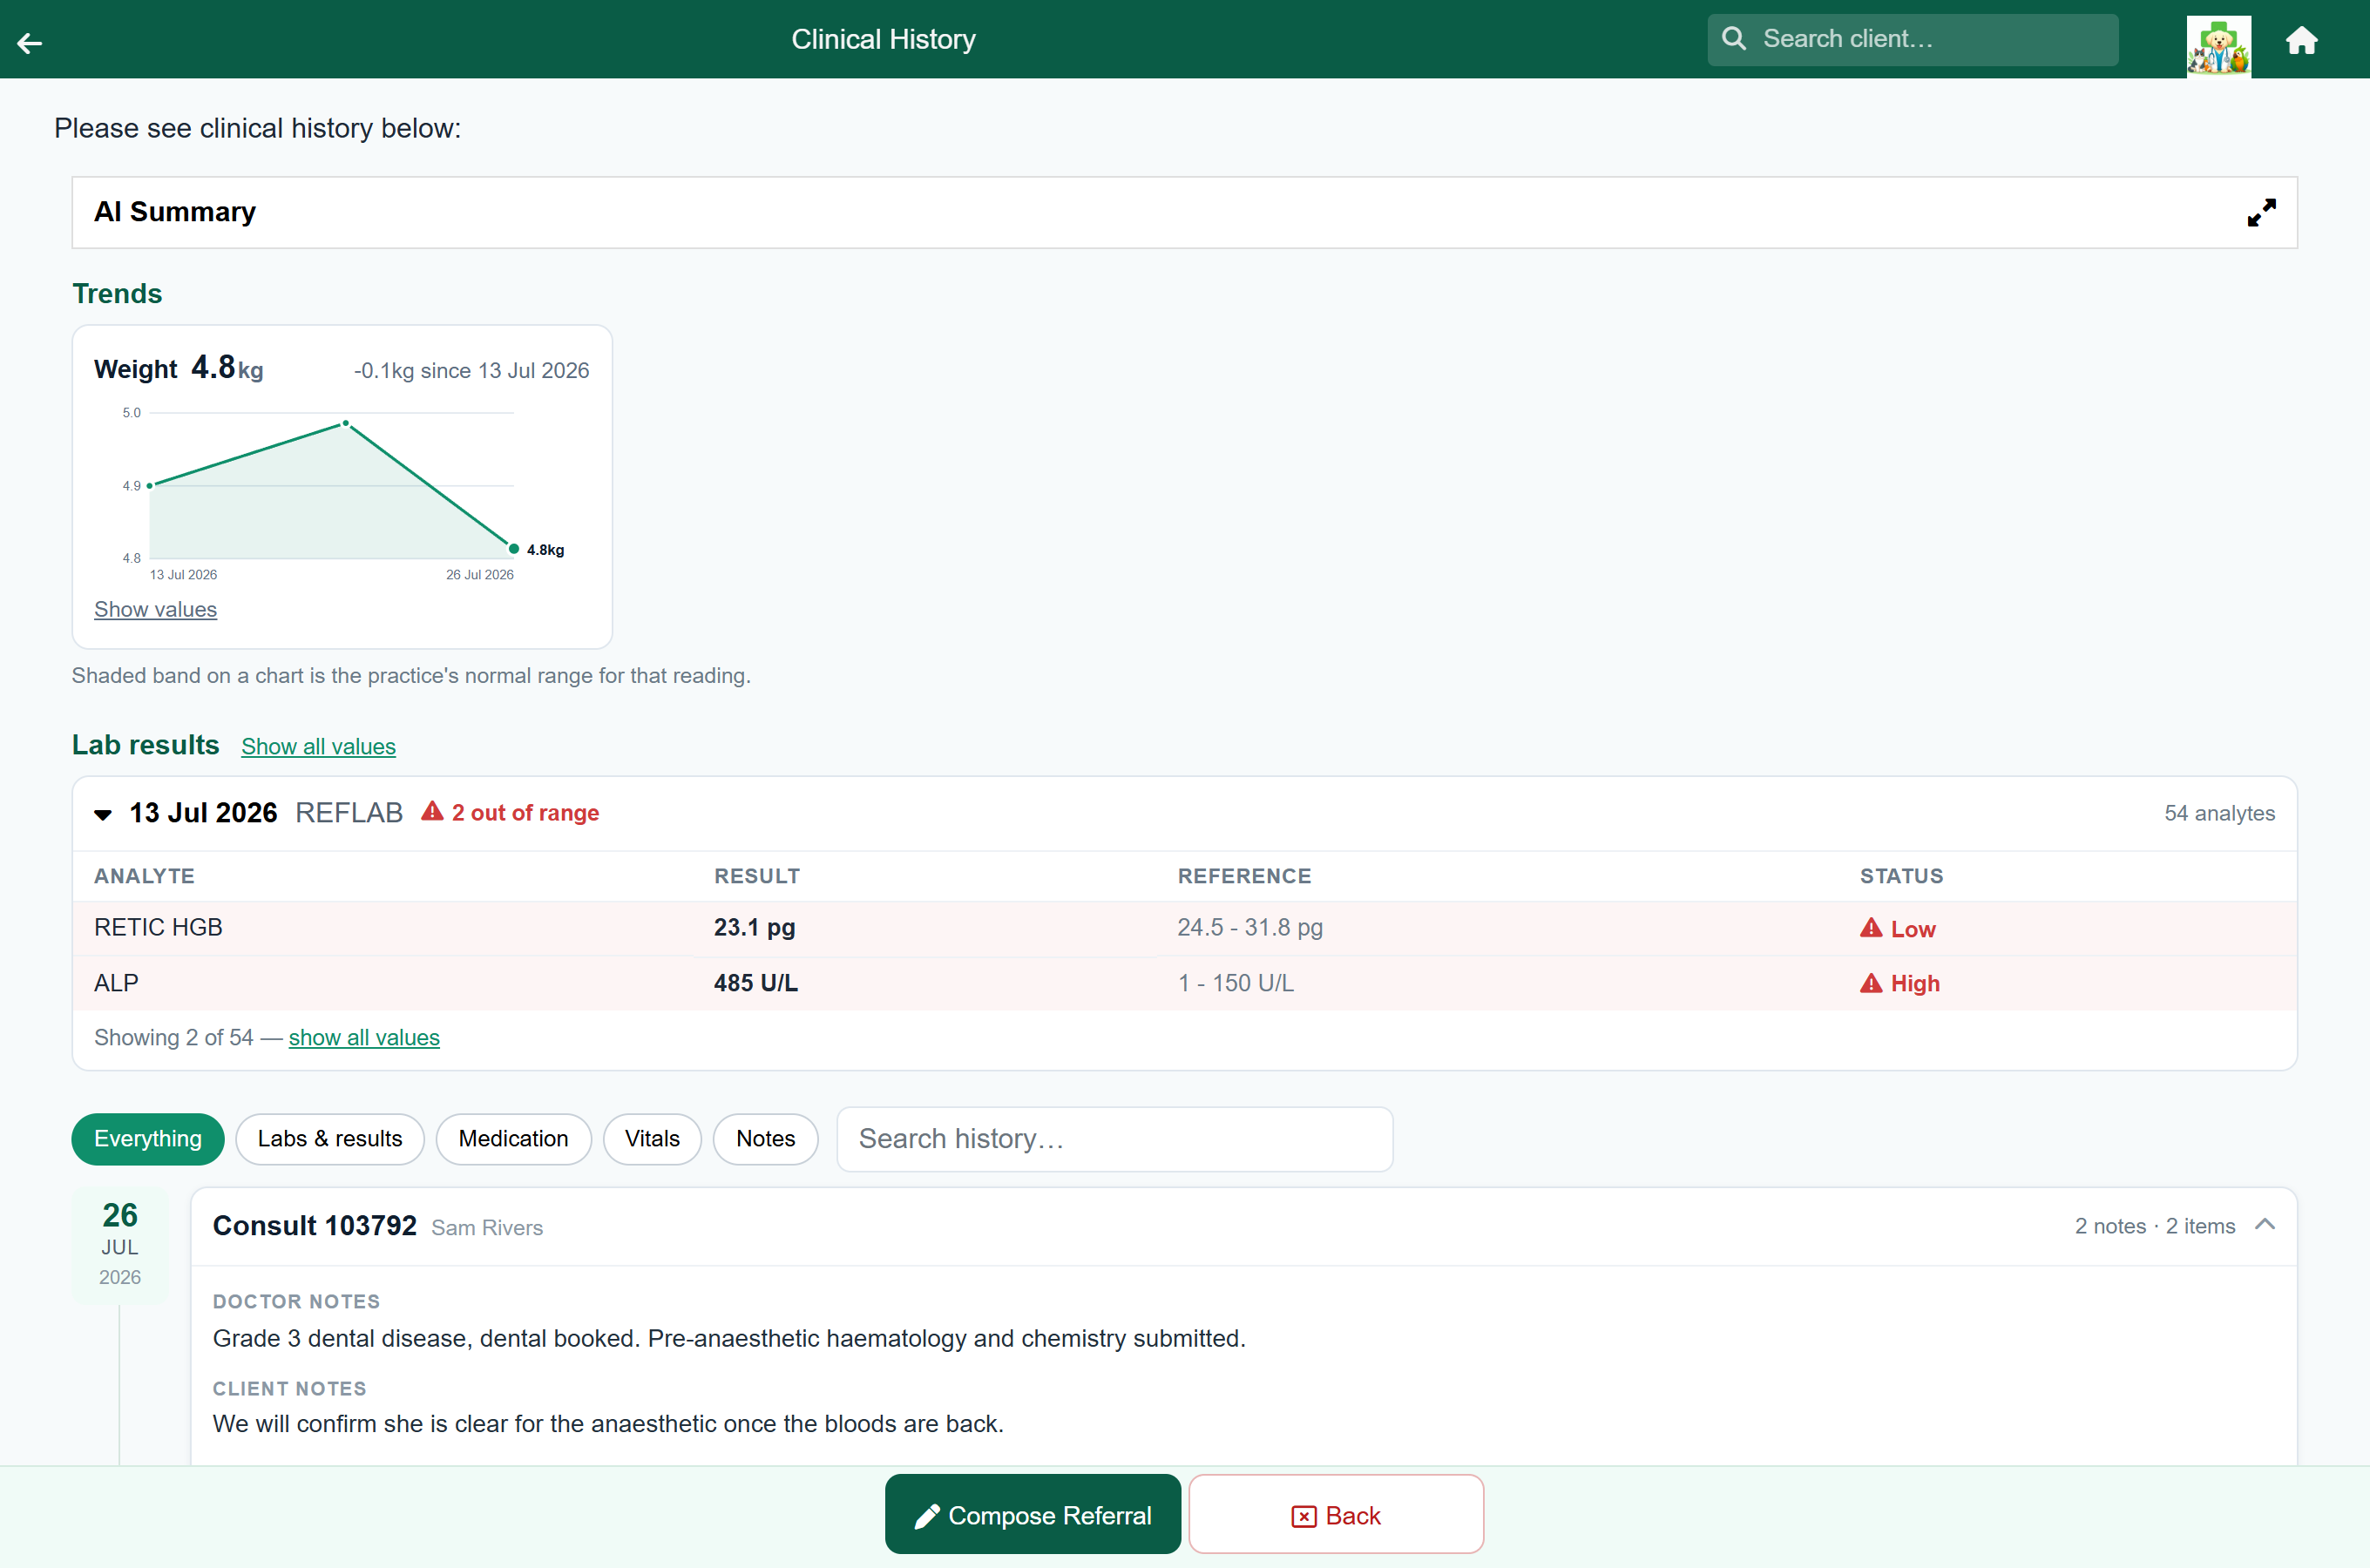
It shows a summary of the patient, weight and vitals trends, lab results with out-of-range values, and every visit with its notes, medication and items — filterable and searchable. For example:
- What did we give last time? — the Medication filter, or type the drug into the search box.
- Is this vaccination due? — the last one is on the timeline with its date.
- Has she lost weight? — the weight chart.
- What did the bloods show in April? — the lab result, opened on its flagged values.
See Clinical history. For the patient's current prescriptions, press Meds — see Prescriptions & repeats.
Admitting from a consultation#
If the patient needs to stay, press Admit to move them into a hospital admission, taking this consultation with them. You do not need to finish the consultation first.
Finishing the visit#
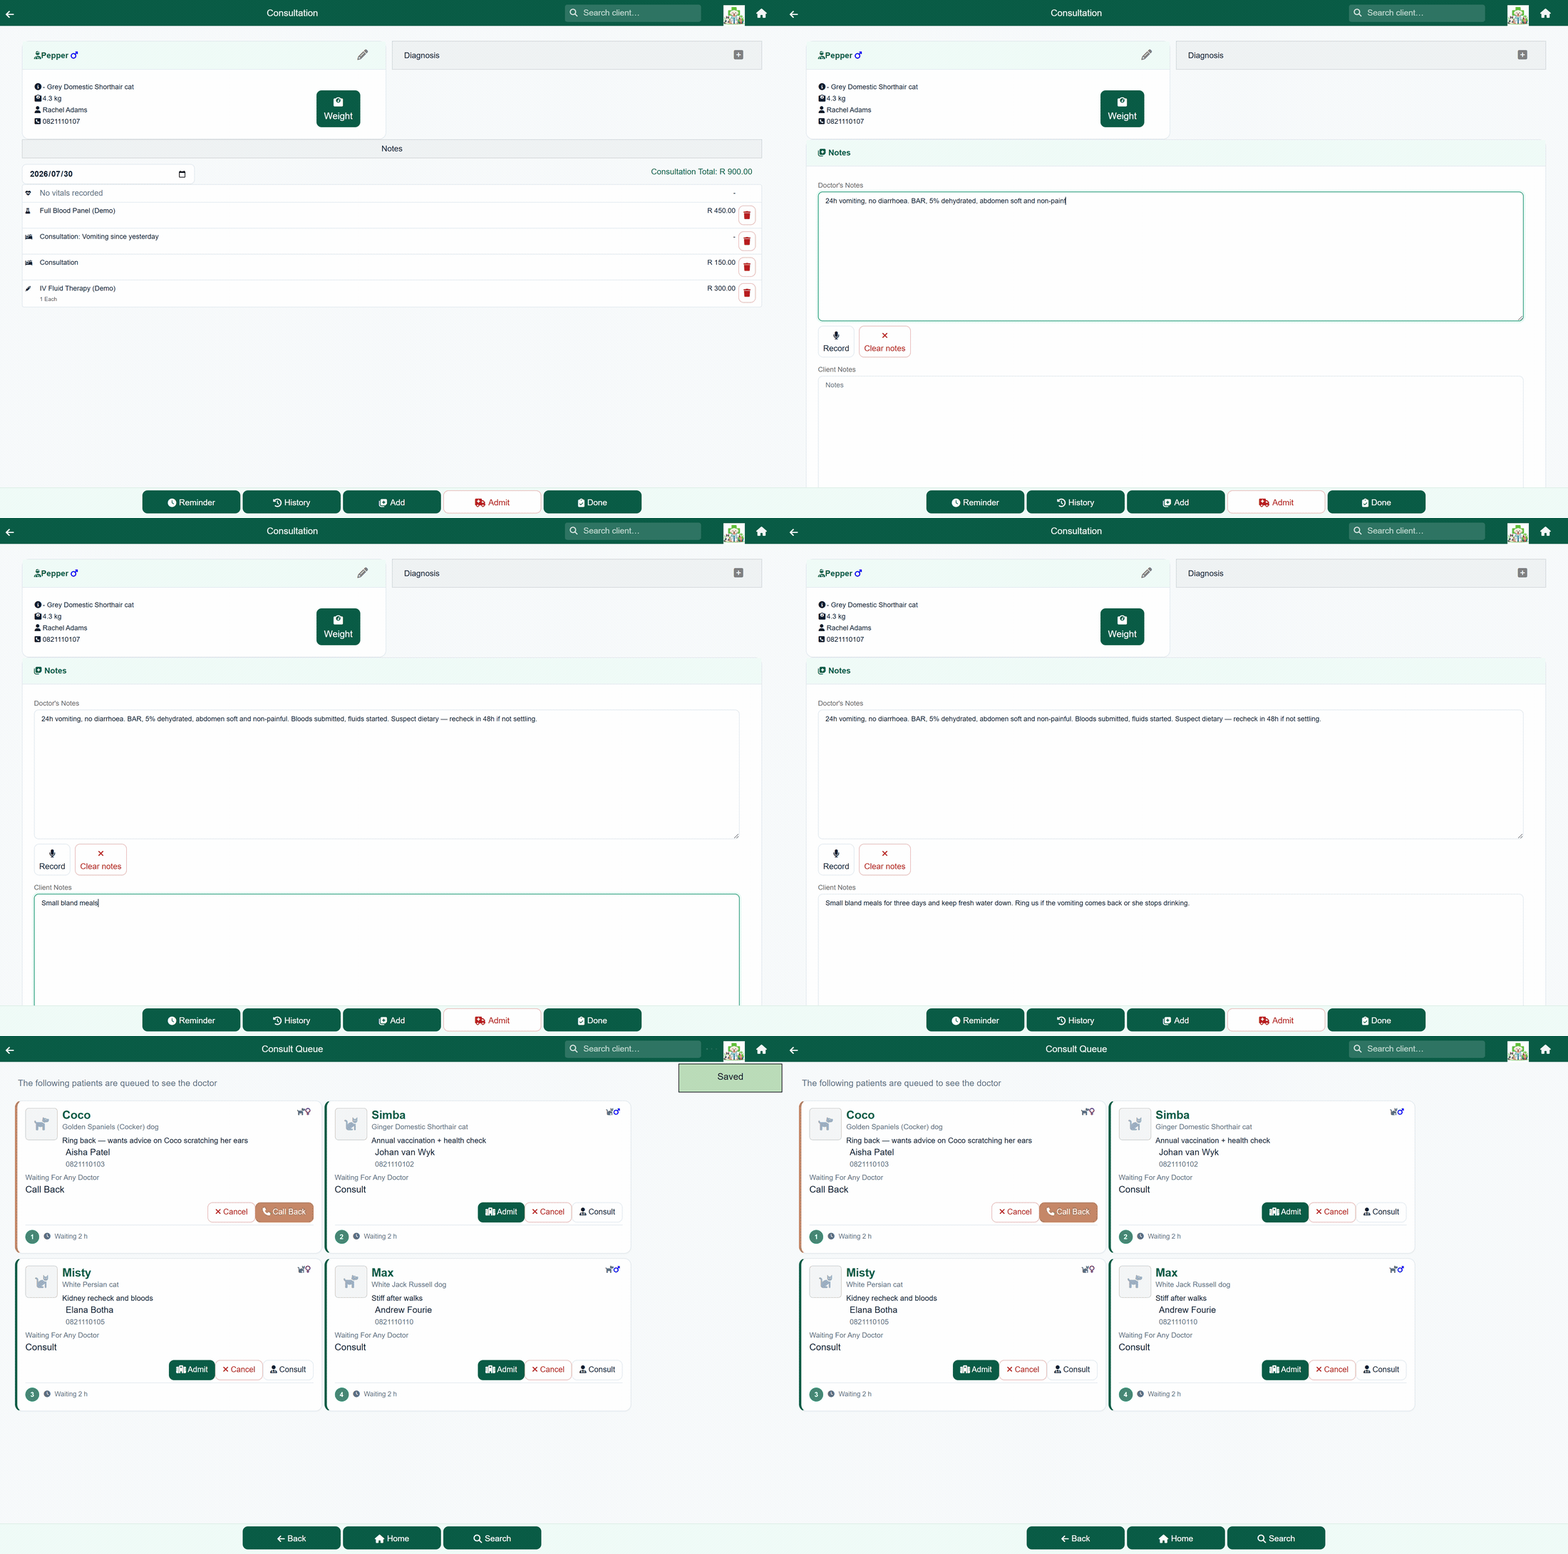
- Check the items and the total.
- Check the notes.
- Press Done. If the consultation has no items, FastVet asks you to confirm.
Finishing closes the consultation, posts the total to the client's account, and moves the patient from the consult queue to the payment queue. FastVet then opens the share screen so you can send the invoice while the client is still there.
Correcting a finished consultation#
To change what a finished consultation charged, reverse it from the client's account. Reversing adds a credit against the original charge rather than deleting it.
Home›Search Client›the client›Statement›the charge›Reverse
Once reversed, you can correct the consultation and finish it again. See Reversing a charge.
Bringing back a cancelled visit#
A consultation removed from the queue can be brought back. Open it and it shows a red Cancelled badge with an Uncancel button.
- Open the cancelled consultation.
- Press Uncancel on the badge.
The patient goes back onto the consult queue, with everything already charged still on the visit, and FastVet takes you to the queue.
Referral letters#
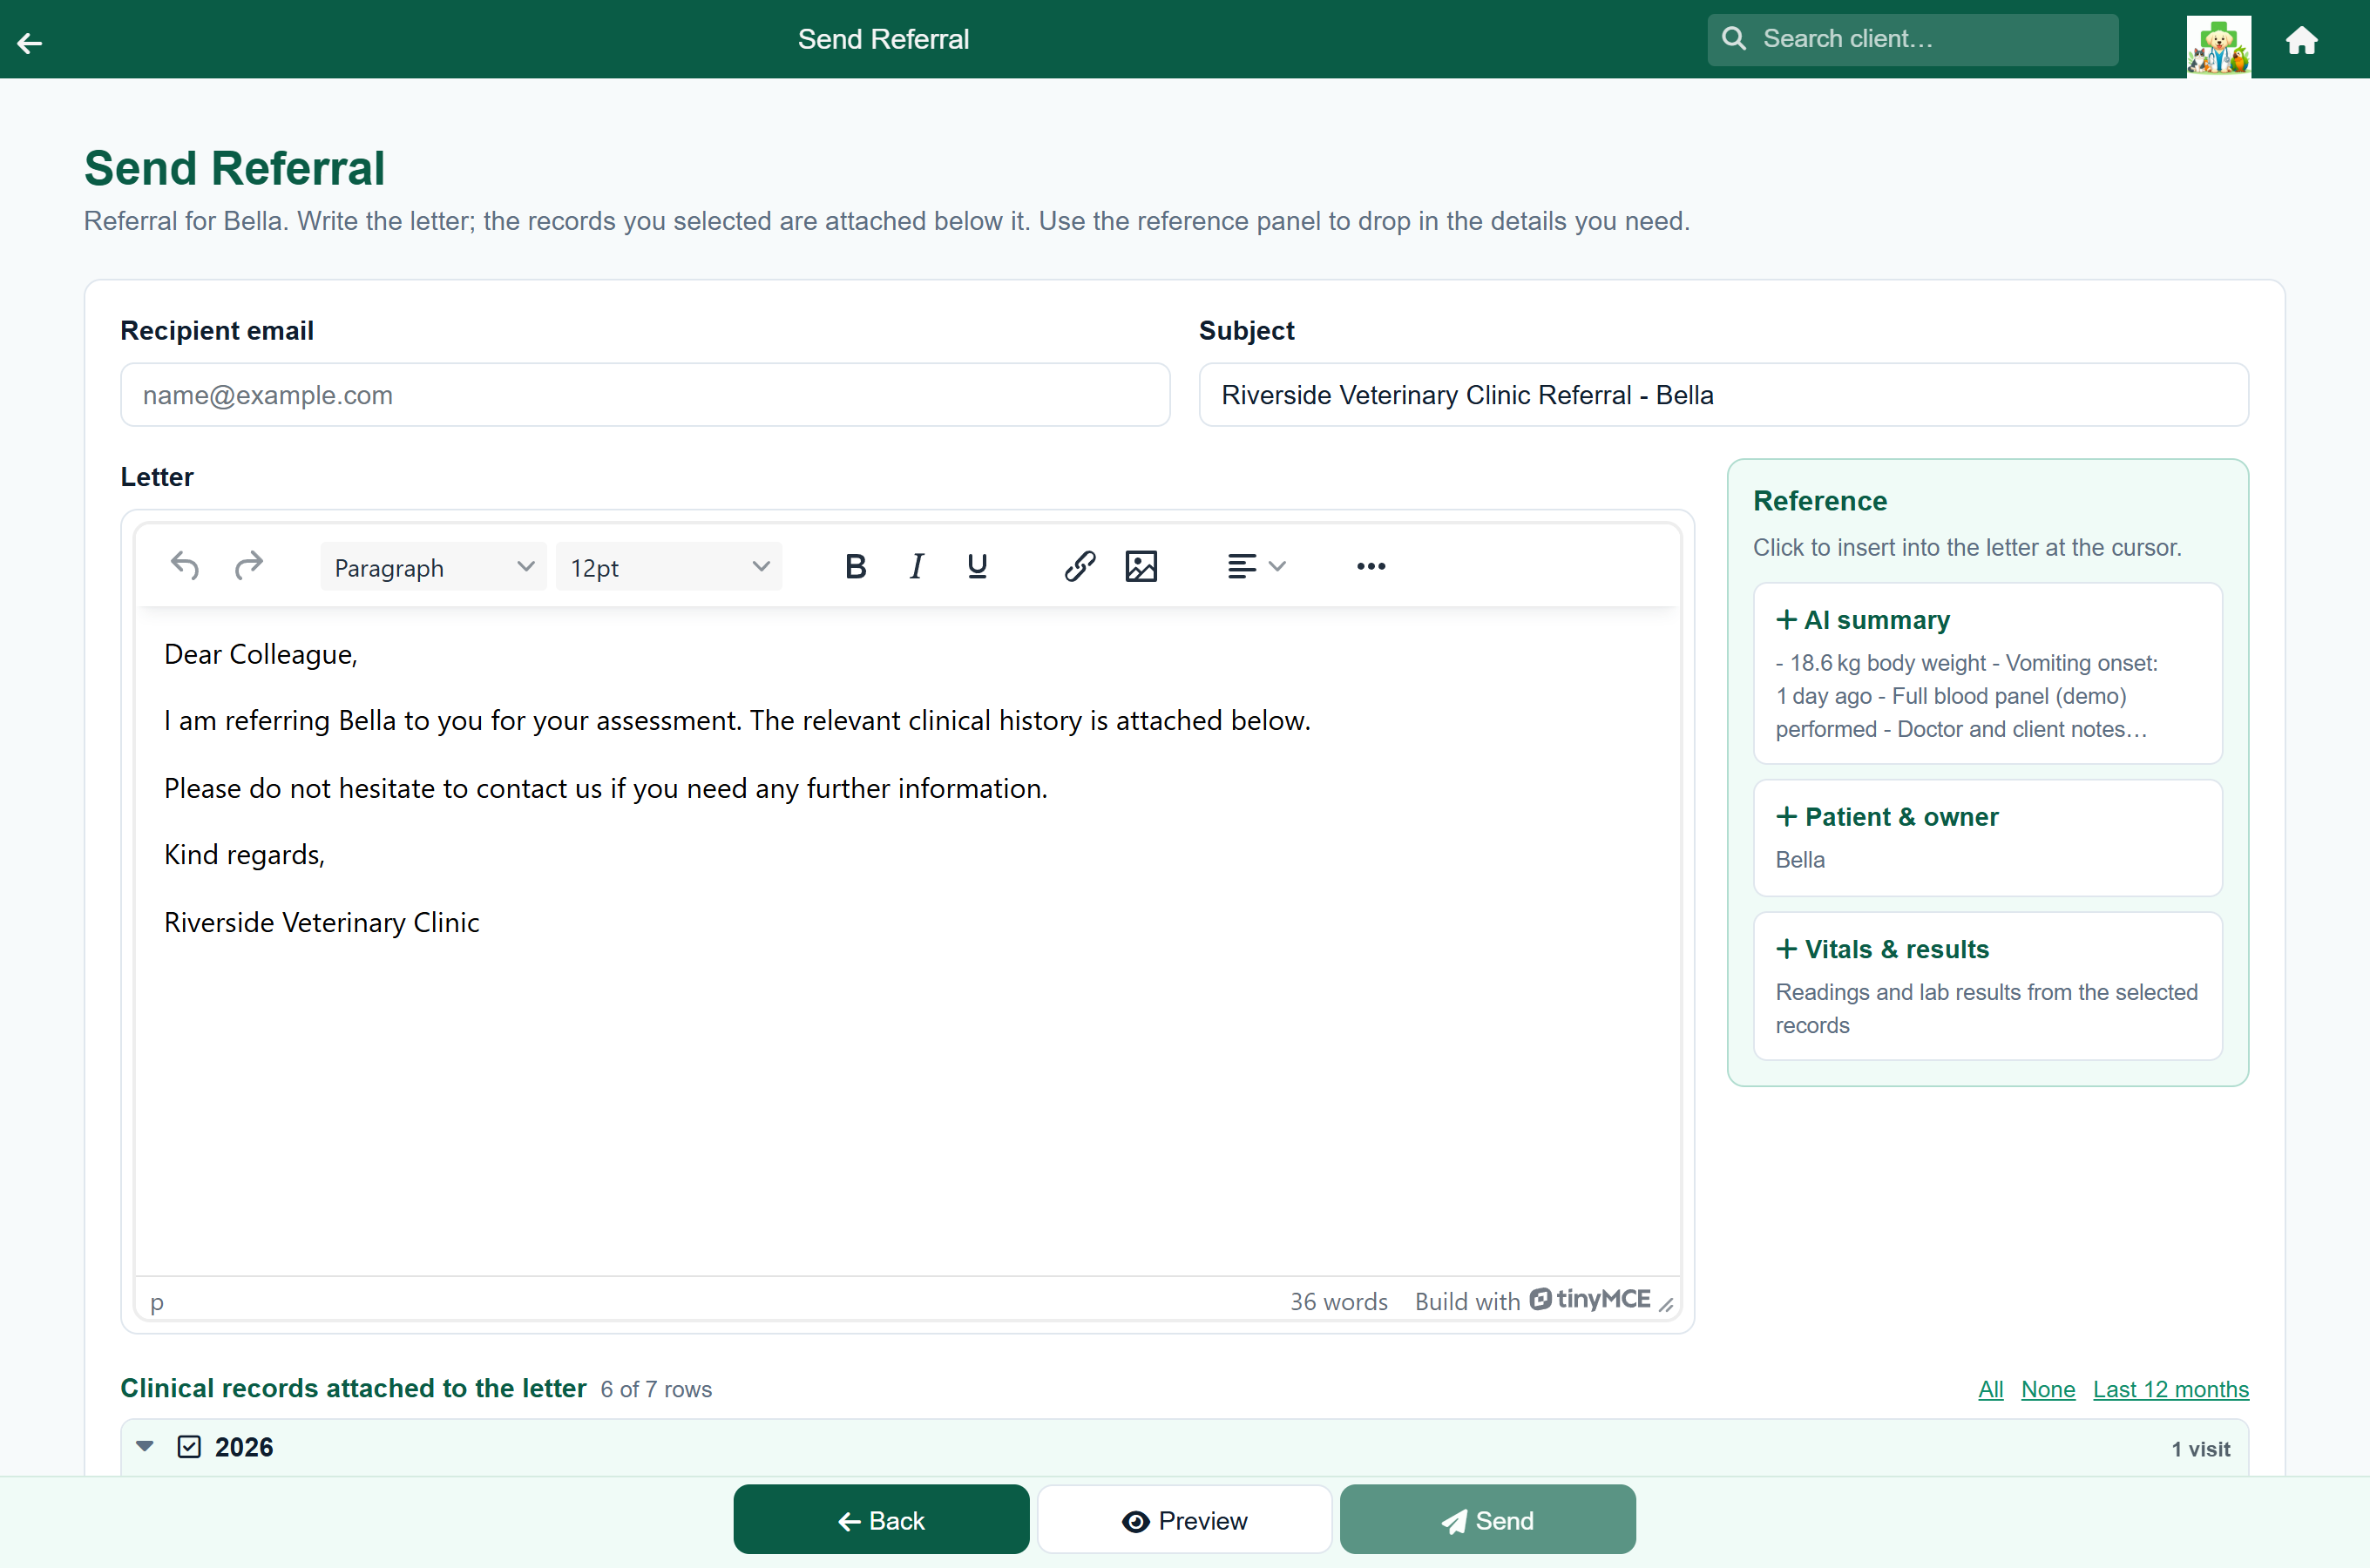
FastVet can compose a referral letter from the patient's history, so the specialist receives the actual records. You start it from the clinical history.
Home›Search Client›the client›the patient’s …›History›Compose Referral
- From the consultation press History, or open the patient's clinical history another way.
- Press Compose Referral in the footer.
- Enter the recipient email and write the letter. Tap an entry in the Reference panel to insert the AI summary, the patient and owner, vitals and lab results, or open diagnoses and medication.
- Under Clinical records attached to the letter, tick the visits and records to include. The last 12 months are ticked for you.
- Press Preview to check the letter, then Send.
Large files. Every file on a ticked record is included, and each shows its size. A file too large to attach — imaging often is — is marked with a link icon and sent as a secure download link in the letter instead. The specialist does not need a FastVet login to download it. The links work for 30 days, and the letter says so.